To start, I chose to stamp it using Distress Ink - Walnut Stain. I wanted a stamped image which doesn't give me a crisped image and Distress Inks are perfect for this.
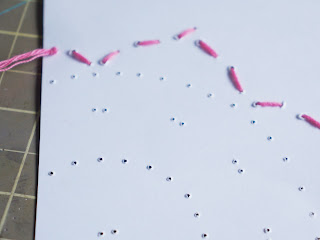
I stamped at the corner of the card and start to poke holes. I used the lines in the stamp as a guide. If you have a thick thread like I do, don't poke the holes too close to each other. For the first round, I only have 5 rows of "lines".
This is how it looks from the back. As it's a simple design, it doesn't create too much bulk at the back.
After finishing the 5 rows, I decided that it wasn't enough. Or maybe I was having too much fun and wanted to sew some more ;)
So, I added more stitchings in between. As you can also see, I was a messy stamper and got some inks outside the stamps.
To fix this I cut out the Mandala leaving a narrow white border around it. And add some Distress Ink below the image so that it would stand out.
I hope you'll give this technique a try and share it :)

All Create A Smile products :
Non-Create A Smile products :
Distress Inks - Walnut Stain & Spiced Marmalade

Follow Create A Smile on Facebook keep yourself updates on all the happenings and if you're an Instagram addict like I am, you can follow Create A Smile using this name : @createasmilestamps ! :)
Thanks for stopping by,


Oh my gosh! What a really pretty card! I'd like to try making a card like this. A friend just sent me a card that looked like she embroidered it, kind of like this one. She said she was going to send me some patterns that she has. I can't wait! Thanks for showing us what you did.
ReplyDelete