Wednesday, May 27, 2020

Winners from May Mood board challenge

Hello everyone !

We had so many gorgeous entries for our mood board challenge and we are happy to see you enjoy the mood board challenges as much as we do . 
Let's see who is the winner from this Mood board challenge ! 

Also wanted to let you know that by playing along with our challenge you get the chance to win a 25€ gift certificate to Create a smile store and to be guest designer for our next challenge!


Kerstin  you are the winner! She created this adorable card using  Stencil Basic circles Big surprise stamp set A little treat stamp set First day of school stamp set


Congrats  please send an email to challengeteam@createasmilestamps.com to claim your prize ! Is so well deserved !

Our featured artist is Nugi and she created this gorgeous card using Just saying hello stamp set Believe in you stamp set 


Congrats !! You can take the badge and display it on your blog is so well deserved !

Thank you everyone for playing along with our mood board challenge ! Make sure to check the current challenge and we hope you play along 

Until next time have a lovely day

Alexandra 

We dare you to create a smile: May Sketch

Hello everyone

time for another sketch challenge and we can't wait to see what you create inspired by the current challenge. The design team and our guest designer bring you some inspiration along


Also don't forget that by playing along with our challenge you get the chance to win a 25€ gift card to Create a smile store and the chance to be guest designer for our next challenge 


Nonni is our guest designer for today's challenge and made this gorgeous card showcasing the sketch and using In bloom stamp set 


Thank you so much for guest designing for our challenge . Make sure to check Nonni's social media to see more of her gorgeous creations .

Let's see how our team was inspired by the new challenge

Alexandra made this card using Coffee collection stamp set A little treat stamp set Cool cuts Scalloped rectangles, Cool cuts Stitched Rectangle frames Coffee collection kit


Debby made this gorgeous card using Very cherry stamp set Cool cuts Tiny sentiments

Ella  made this sweet card using Cool buddies stamp set Cool cuts Lovely tags MStencil Big stars polka


Linda made this gorgeous card using All hands on deck stamp set 


Martina made this adorable card using one of our Bear mail stamp set 


Melanie made this wonderful card using Floral decorations stamp set Mini Geburtstag stamp set Cool cuts Scalloped Rectangles


Melissa made this awesome card using Friends in the woods stamp set Floral decorations stamp set 


Nathalie made this amazing card using Geometrics stamp set Viel Glück stamp set


Hope you feel inspired to play along with our challenge . Please make sure to check the challenge rules below before you enter you card!


You are invited to the Inlinkz link party!
Click here to enter

Saturday, May 23, 2020

You're Mine Seagull!

Hi there!
Samantha here, and today I'm sharing this funny card that made me smile the whole time I made it!


Of course, the seagulls reminded me of the birds from Finding Nemo! Ha!! And my youngest son and I always tell each other: You're Mine! So I thought it would be fun to turn that into a card for him! Ha!


Let's make this card together!

- I started by stamping and coloring the images with Zig Clean Color Real Brush Markers! Once everything was dry, I fussy cut them out!
- I used a different kind of grey for each seagull, it's just a subtle difference, but I like it! 
- I also added some pink cheeks to the gulls because...cheeks! lol!! 


- to create the background, I used some Tumbled Glass Distress Ink and white embossing paste to add the tinted color! 
- then I used my palette knife to smooth it through the stencil! 
- I finished the card by combining the sentiments from two sets and heat embossed in white onto black cardstock, which I then fussy cut out!


Adding ink to white embossing paste is a great way to tint it!! I love adding blues for oceans (like here), or clouds, but you can add ANY color for ANY background! Such a fun idea!


I used Waves stencil (which I think is retired - so sorry!!). 
The seagulls are from Gull Gang, the speech bubble is from Say What?, and the part of the sentiment came from Tiny Letterings.


There is ALWAYS a fun challenge going on in the Create a Smile Stamp Facebook group page! It's fun and filled with prizes! I love seeing all of the incredible, unique and amazing inspiration!
~Samantha


Saturday, May 16, 2020

Take Care!

Hello Friends!  It's Candice with you and I hope you all are having a beautiful weekend!  Today I am sharing a clean and simple card with you!


I wanted to make a clean and simple card that I could give to those who are tirelessly working to take care of those who are sick and that would allow me to make multiples quickly and are mailing friendly!  I want them to know that we can take care of them too!


-First, I created my 8 1/2 x 3 1/2 inch card base which will fit in your standard size envelopes.

-For the frame, I used the partial die cut method with the Scalloped Rectangles cool cuts from Kraft cardstock and then used a smaller Double Stitched Rectangle cool cuts to cut out the center and create my frame.


-I then made the ray using the Focal Point stencil directly onto the card base with abandoned coral, fossilized amber & squeezed lemonade.  I also added a small ray in the top left corner.

-Next, I stamped the images from the adorable Doctor's Helpers stamp set, colored them with copic markers and fussy cut out.  I added some accents with a white pen.

-To finish the card, I added the frame with foam tape and stamped the two sentiments in Versafine black ink.


I went with a design that I can make multiples of in many different colors.  I could easily do this in green and blues for a masculine card!


Double Stitched Rectangles cool cuts


You can join in the bi-weekly challenge for your chance to win and maybe even guest design for the next challenge!

Thank you for stopping by today!
Candice

Thursday, May 14, 2020

Winners from Sketch challenge

Hello everyone !

Picking only two winners is always a hard job , as we had so many amazing entries for our challenge. You always amaze us with your creativity and with all different designs   

Also wanted to let you know that by playing along with our challenge you get the chance to win a 25€ gift certificate to Create a smile store and to be guest designer for our next challenge!


The winner of a 25€ gift card is Nonni with this gorgeous card using In bloom stamp set 


Congrats  please send an email to challengeteam@createasmilestamps.com to claim your prize ! Is so well deserved !

Our featured artist from the sketch challenge is Disha with this adorable card using Just because stamp set You blow my mind stamp set


Congrats !! You can take the badge and display it on your blog is so well deserved !


 Make sure to check the blog for the new challenge and I hope you are inspired to play along with us. 
Until next time have a great day!

Alexandra

Wednesday, May 13, 2020

Hello Friend..

Hello and welcome!! Laurie here with my first post as an official member of the Create A Smile Stamps design team! I was a part of the CAS Challenge Team last year and enjoyed every minute of it. I am beyond thrilled to be back and part of this team!!

For my first project, I went with more of an elegant, floral card.


I wanted to create something soft and pretty but also with a little shine.


I started by silver heat embossing one of the larger branch images as well as two stand alone blossoms and leaves onto a piece of mixed media paper. I kept the watercoloring very simple by using only two colours, one pink shade and one green shade.

I added a bit of water onto each section of the image, then dropped in a touch of colour. This is the wet-on-wet technique. When the colour is dropped into the water, it spreads and blends on its own. The hardest part about this in not to play around with it! Try to let it do it's own thing!

When the painting was done and everything was dry, I used my scissors to fussy cut everything out. Call me crazy, but i actually like fussy cutting!


I created a square card base that is 4.25 X 4.25 inches. I love clean and simple cards but I also love layers so I used a couple of the Cool Cuts Stitched Circle Frames. On the larger circle, I used the Diagonal Grid Stencil along with a light blue ink. This gave a bit of background colour as well as a bit of texture. I silver heat embossed the sentiment on the smaller circle as well as inked the frame portion in the same blue ink. 

I played around with all the elements and after deciding where everything should go, used a combination of foam adhesive and liquid glue. As a final touch, I added a few clear sequins.


I watercoloring is a little out of your comfort zone, try heat embossing the images! This creates a "well" so the water stays contained and your colours won't bleed! This is my favourite way to watercolour!

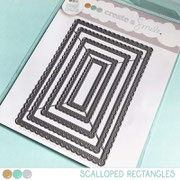
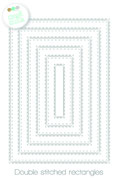
When it comes to all the Stitched Frame Dies in the CAS shop, remember that each die cuts two pieces! This gives you so many options when designing your cards or layouts!


Diagonal Grid Stencil


Very Cherry Stamp Set


Cool Cuts Stitched Circle Frames


Have fun, my friends!

Thank you so much for stopping in today! I hope you enjoyed today's card!

Be back soon...

Laurie