Friday, June 30, 2017

Hello from the Ocean!

Hi there!
Samantha here sharing this AWESOME, summery card!! It's perfect to send to someone, just to say 'hello'!!


OMG - that rhino. That's all I can say. I created this card because I'm in love with the rhino! Ha! :)


Let's get to it! 

- stamp and color the images! (I used Zig Clean Color Real Brush markers)
- fussy cut out!
- add foam tape to the inflatable floaties for his arms! And adhere the breathing part of the snorkel! 


- on the card front, create the ocean!
- all I did was smoosh Peacock Feathers, Mermaid Lagoon and Vintage Photo onto my craftmat, then spritz with water. I took my card front and tapped it lightly into the water-y mix. Let it dry and repeated the process! Love!
- stamp/heat emboss the sentiment and add the AWESOME Pretty Pink Posh clear drops!


Are there any one-layer lovers out there? This would be a wonderful card for you do! Just stamp and mask off the goat, and ta-da! 


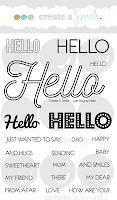
That ADORABLE rhino is from the Beach Party Kit, and I just LOVE it!!!! I used the sentiment from Just Saying Hello stamp set!


Did you know that Create a Smile sells their OWN acrylic blocks! They're AMAZING because they have grids on them!! Everything is easily lined up! It's awesome! 

~Samantha


Wednesday, June 28, 2017

Simple Gift Boxes

Hey stampers, Anni here!

Today I want to show you three simple gift boxes.


A friend asked me to make a few gift boxes for her because she wanted to give away money for birthdays.


  • I die cut the boxes from watercolour paper. Later I noticed that wasn't the best idea because the paper craked whe I scored the boxes. But in the end it wasn't to bad.
  • I created backgrounds using watercolour and coloured the images with the same medium.
  • I fussy cut the iimages.
  • I stamped the sentiment on a banner of white cardstock and assembled the boxes - you see pretty easy!


Follow Create a Smile on Facebook and Instagram to get all the news!


Tuesday, June 27, 2017

Funky Feathers

 Hi crafty friends and welcome back to our crafty space. Raluca here with a new card showcasing the "Funky Feathers" stamp set.


I always loved to see artsy cards. You know. the watercolor ones that look like a talented artist created them. So I tried making one and I have to say I really love how it looks.


On a watercolor cardstock I stamped the outline feathers from the set using Distress Ink Chipped Sapphire and Evergreen Bough. Then, I stamped the solid stamps for the feathers using Distress Ink Tumbled Glass, Peacock Feathers and Cracked Pistachio. 
After I was done stamping I sprayed with a mini sprayer clean water all over my panel and I let it spread. 
Next step was to stamp again the outline stamps using VersaFine Onyx Black Ink and to add black splatters all over the panel. 
Then, I stamped the sentiment in VersaMark and white heat embossed it on a black strip and adhered it to the panel. 
I glued a few gold sequins and my card was done.


Double Stitched Rectangles


Funky Feathers


Time To say thanks


Pretty Pink Posh Metallic Gold 4mm

Pretty Pink Posh Metallic Gold 6mm


If you love Instagram like I do, you can follow Create A Smile using the name @createasmilestamps and if you have any questions about card making, techniques or products or if you want to share your creations with Create A Smile fans join us on our Facebook group Create A Smile - Friends & Family :).

Have a lovely Tuesday!
Thanks for stopping by,
Raluca

Monday, June 26, 2017

Baby......

Hi there, I hope you like the welcome baby stampset as much as I do because I have another card to share with you using this stampset.


This welcome baby stampset is one of my favorites there are so many nice little stamps you can use to build your card and no card will be the same.


I once again started with a topfolded white cardbase.
Used the double stitched rectangle dieset for my vellum and to build a frame out of white cardstock.
I also gave the vellum showing through the frame some extra interest with an embossingfolder.
I stamped the different images on copic friendly cardstock and on some patterned paper.
Cut everything leaving a nice white outline and started building the card.


Stamp;

Welcome baby;


Cool cuts ( dies);

Double stitched rectangle;


There are stamps on sale over at the shop so be sure to grab some and start creating.

Have a great week;

Hugs Anja

Sunday, June 25, 2017

Be Bold - Part 3

Let's bring the boldness to your sentiment, this time :) So, I hope you're having a great Sunday and carry on reading this post :D 


First, I've stamped the word Thanks in the middle of the card base with Distress Ink Antique Linen. It give a light impression and I can use it with other watercolours on top of it without changing the colours I want to use. 

I use a thin waterbrush to just draw the in the alphabets with Prima Watercolours.

Next, as you can see I've added a thick black frame and little ribbons as embellishments. 


Follow Create A Smile on Facebook keep yourself updates on all the happenings and if you're an Instagram addict like I am, you can follow Create A Smile using this name : @createasmilestamps ! :)


Thanks for stopping by,


Friday, June 23, 2017

Poor, Sad Little Goat!

Hi there!
Samantha here and today I've got a cute card for someone you love who is either having a bad day, or going through a rough patch!


I know we all have those times when we feel down, and like a black cloud is hanging over our heads! It's good to know we have people to lean on in those times! 


Let's get to making!

- stamp and color your critter (I used Zig Clean Color Real Brush Markers)
- fussy cut out
- gather your Distress Inks and blending tool and get ready to get inky!


- using a piece of typing paper, mask off the sky and blend the grass together (Twisted Citron and Mowed Lawn)
- switch the mask over the grass this time, and blend out the sky (Mermaid Lagoon and Peacock Feathers for the blues and Hickory Smoke and Pumice Stone for the grays)
- splatter the gray area with grey, watered down ink, and white acrylic paint
- stamp the sentiment and pop up the critter! 


Are there any one-layer lovers out there? This would be a wonderful card for you do! Just stamp and mask off the goat, and ta-da! 


I created this card with that sweet, sad little goat image from the When You're Not Around stamp set! 


Did you notice the sequins on my card? Did you know that Create a Smile stamps sells Pretty Pink Posh sequins in the shop? All of your needs, in one convenient place!

~Samantha

Thursday, June 22, 2017

happy rainbows 4/5 * von Herzen

Hello crafty friends, Nicole here.

Moving on with my "rainbow" mini series... 😊 

I love rainbow colors on cards. They make me happy. It's that simple 😉💕🌈 


I love making clean and simple cards. This is again an easy one. Take some inks you like (I used dye inks but you also can use pigment ink) and create a rainbow colored wreath. I used a pencil to draw a circle, just to get the shape of the wreath right. Be sure to erase the pencil lines step by step before you stamp. To add some interest, I used white Nuvo Drops.


Botanical Love / Magic Flowers / Dekorierte Grüsse - bunte Erweiterung
  

Check out the online store! 😊

Have a colorful and happy day!
Thanks for stopping by,
Nicole