Sunday, June 26, 2016

DIY Background Part 2

Hi Everyone!  Sorry for being a bit late, the internet broke down and I couldn't save post early enough. So, another week of DIY background.

Don't forget! The Challenge of the Month is still going on!  One lucky winner will receive a 15€ gift card.


The great thing about this card is that, you can use with literally ANY stamp sets you have.  I decided to use the bottles to show an example of how you can do it. I've made my own masking using a regular typing paper and a temporary adhesive. The typing paper is good and thin for this method. You can also use post-its or regular masking paper if you have. 


To stamp, I'm using Memento black ink because it works well with Copic. So, choose your black in carefully as you don't want to ruin your piece after all that stamping and masking effort.

As you can see in the first photo, that I cut the piece and have the kraft cardstock shown. But you can leave the background as it is and use a black cardstock with a white embossed sentiment to finish.


All Create A Smile products : 


Follow Create A Smile on Facebook keep yourself updates on all the happenings and if you're an Instagram addict like I am, you can follow Create A Smile using this name : @createasmilestamps ! :)

Thanks for stopping by,


Saturday, June 25, 2016

Baby Card for Twins

Hey stampers, Anni here!
Today I have a baby card for you.


A friend of mine got twins just a few days ago and I wanted to make a personalized card for her.


  • Die cut a cloud mask from masking paper. Create a sky by ink blending and using the mask. 
  • Stamp, color and fussy cut two foxes and a bow.
  • Create the sentiment with alpha stickers and a stamp.
  • Assemble the card.
  • For a baby card I love to personalize the card. It is so easy to add the baby's name with alphabet stickers.
  • This was my first try at creating a sky. I have to say it is easier as it seems.

Don't forget to play along in our challenge! The theme is favorite and you still have a few days to join the fun!


Friday, June 24, 2016

Treat Yourself Card

Hello again!
Samantha here with you as usual on this beautiful Friday! :) Today, I'm sharing a card that I hope will make you giggle! :)


I just LOVE those hippos from the Served Up stamp set! And, shockingly, I hadn't used them yet!! HOW DID THAT HAPPEN?! So I had to rectify that, and make this cute, possibly hilarious card! :)


I really think this card is just FUN! So let's get to it and make it, shall we?

- first, I stamped and colored the images with Copic Markers, and then fussy cut them out!
- using a sun rays stencil and some gelatos, I created some little morning sun rays!
- then, I used the Stacked Pierced Oval Dies to die cut


- I heat embossed the sentiment with white, onto black cardstock, and then popped up both the images and the sentiment!
- I went a little crazy with the white gel pen....oops!! 
- lastly, I added some blue watercolor underneath the whole area with Peacock Feathers and Tumbled Glass Distress Inks


I used lots of coloring mediums on this: gelatos, copics, Distress Inks for watercoloring...and it was a lot of FUN! But you could also create an awesome card if you don't  have all of those supplies: patterned paper die cut (in place of the sun rays), paper pieced images of the hippo and coffee cup, and mist for the background!


As I mentioned above, I used the cute cute CUTE Served Up stamp set! I also used Coffee First and the awesome Stacked Pierced Oval Dies!


Have you joined the Create a Smile Friends and Family Facebook group yet? It's the perfect place for inspiration, ideas and there's also a challenge there! Be sure to check it out! 

Thanks again for hanging out with me today!
       

Tuesday, June 21, 2016

Aloha!

Aloha! It's Keeway here today and I'm sharing a bright, and tropical-inspired card for your hot, summer day.


I absolutely love these Hawaiin flowers and to really have them shine through bright coloring and details. What can be more fun than spending a few hours coloring these beauties!


1. Stamp the flowers and leaves in ink colors that are slightly darker than what you will color them in with.
2. Color the images with copic markers.
3. Add highlights and details with a white gel pen to really make the coloring pop!
4. Stamp the sentiment "aloha" in black ink.
5. Add spotlight diecutting to the sentiment to draw attention to it. Here, I used a double stitched circle die.
6. Remove your die cut piece, and add black paint splatter.
7. Adhere your colored piece onto A2 card base. Then add back the die cut piece with foam tape, to add dimension to your spotlight.


http://www.createasmilestamps.com/stempel-stamps/aloha-spirit/#cc-m-product-12579765923

Follow Create A Smile on Facebook keep yourself updates (and early sneak peeks!) on all the happenings and on instagram at @createasmilestamps.


Monday, June 20, 2016

Happy graduation......

Hi there it's Anja again on this monday with another card for you.


The past few days many of our friends have been stressed about their examinations and were relieved to hear they passed. So I had to make some graduation cards for them.


I started with a black cardbase and adhered a slightly smaller red panel to it. I took another slightly smaller white panel and stamped the paper and the numbers. Colored them with copics and stamped the sentiment.
To bring it all together I made an outline with a black marker.
Stamped the cute owl and colord it and fuzzy cut it. Placed it with some foamtape on the number 0.
Diecut the monocle out of black cardstock and glued it down. To make "glasses"I used some glossy accents.


Stamps;

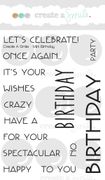
Friends in the Woods, Just because, Mini Birthday , Crystal numbers and Flaschenpost


Cool cuts (dies)

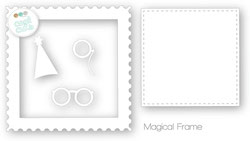
Magical frame;


As you know by now I love to stretch stamps and I am Always looking for ideas to use the stamps in different ways. You can also combine the different sets that's what I like so much of those stampsets.


There is still time to join in the fun of our monthly challenge we love to see what you all come up with.

Have a great week;

Hugs Anja

Sunday, June 19, 2016

DIY Background Part 1

Hi Everyone!  I have you enjoyed some ink blending cards for the last few weeks. Today and also in the next 2 weeks, I will be sharing some DIY background cards. 

Don't forget! The Challenge of the Month is still going on!  One lucky winner will receive a 15€ gift card.


I will start with a bold and colourful card. Enjoy! 


To start, I took all the “Happy” words and arranged them. If you have a big enough stamping block, you can even pick them all up so you don’t have to stamp them one by one. I did stamped some words on their own to fit into the space more efficiently. 


I used my Prima Watercolours to just make a very loose rainbow patch on the card. No restriction. You can do it with various shades of blue or orange, etc.  


I chose to use a big bold die cut to create the main sentiment in the middle. To make the die-cut stand out, I’ve stuck a black paper underneath it. To have the black strip of paper, I feel like it helps to “ground” the busy looking background. 

If you don’t have a die cut machine, you can use the alphabet sticks or a big sentiment stamp. 

That's all for today :) 


All Create A Smile products : 

Non-Create A Smile products : 
Distress Ink Pads - Seedless Preserve


Follow Create A Smile on Facebook keep yourself updates on all the happenings and if you're an Instagram addict like I am, you can follow Create A Smile using this name : @createasmilestamps ! :)

Thanks for stopping by,