Showing posts with label Mini Thanks. Show all posts

Wednesday, May 23, 2018

We dare you to create : Thank you edition

Hello everyone!

It's time for a new challenge on the blog , and now the theme is '' Thank you ''

Also as the 6 months term for our current Challenge Design Team is almost over there is a new Challenge DT call on the blog so make sure to check it out :) 

Now let's see some inspiration from our Guest Designer which is Anja which created this lovely card using Dress me up stamp set , Big Hearts Polka stencil  , Cool cuts Doppeltes Danke


Thank you so much Anja for creating this adorable card for our challenge and for being our guest designer .

Now let's see what our design team created

Alexandra created this set of cards using Cling Mandala stamp and Cool Cuts Thanks Twice


Christine created this adorable card using Cool cuts Stacked Pierced Ovals , Es ist serviert stamp set , Stencil Blossom


Farida created this beautiful card using Dekorierte Grüße stamp set  , Stencil Petals


Galina created this amazing card using Decorated Wishes - mixed add-on stamp set  , Underwaterlove stamp set


Kaja created this beautiful card using Sharp one stamp set , Mini thanks stamp set


Laura created this beautiful card using Decorated Wishes stamp set , Decorated wishes -mixed add-on


Nicky created this adorable card using All hands on deck stamp set , Stencil Focal point


Hope you were inspired to play along with our challenge , please take a moment to read the rules before link your project


Monday, October 9, 2017

Thanks, ...for everything you do.

Hi there it's Anja again. I hope you enjoyed our new release past Friday and were able to lay your hands on some of the great new stamps. Today I will show you a card with some older stamps but also very versatile and beautiful.


I wanted to try several techniques I found on the internet and corporated them into this card. Over at Jennifer Mcquire's blog there was a multiple color stamping technique which I used for the THANKS word. The other technique was stamping the sentiment in swirl.


As Always I started with a topfolded cardbase and diecut a panel with the rectangle die.
First I stamped the sentiment by bending it onto my acrylic stampblock and by repeadetly stamping it I created a swirl.
I stamped several flower and leaves images onto some watercolor paper and colored them with some zig clean  color brush pencils. Cut them leaving some white space. I stamped the word THANKS with three different colors and also cut it leaving some white ouline.
Adhered everything to the panel and finished the card with some sequins and some accents with a white gelpen.
Glued the panel onto the cardbase and I liked the outcome of the card.


Stamps;

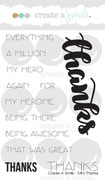
In bloom, Magic flowers Mini thanks en time to say thanks.


Cool cuts (dies)

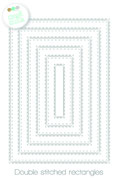
Double stitched rectangles.


We love to see what you come up with and please visit the create a smile shop for lots and lots other great supplies.

Have a great week;

Hugs Anja

Friday, February 3, 2017

A Million and One Thanks Card

Hi there!
Samantha here, and today I am sharing a card with some flowers! 


My inspiration for this...one word: Kelly Latevola...yeah...she's AMAZING!! Check out this card!! 


This card was so fun to make, but it did take a little bit of time!
- I started by stamping three of the flower images onto watercolor cardstock
- I used my Zig Clean Color Real Brush Markers in only TWO different greys! That's right: all of the grey work was done with only two of the markers! So fun!


- once the flowers were finished, I moved onto the cardfront
- I stamped the flower images onto my cardfront in the places I wanted them. Then I scribbled some of the Zig colors onto a piece of packaging from an old sticker sheet, spritzed with water and pressed it to my cardfront! It's such an EASY way to add a watercolor look!
- once the cardfront is dry and watercolored to your liking, I fussy cut out the flowers and adhered them to the card.
- the sentiment was heat embossed onto a black strip of cardstock and popped up!


You could create something similar to this look with colored pencils or copics, too! Instead of a watercolor look, it would give you a soft, fade out! 


The gorgeous flowers are from the Botanical Love stamp set, and the sentiment is from Mini: Thanks!


Oh my goodness! Have you seen the newest release?! It's magic and wonderful and unique! EEEEEK! 


~Samantha


Thursday, October 13, 2016

wunderbar

Hello crafty friends, Nicole here.


As soon as I got that cute coffee pot stamp, I had to color it but it did not get a home on a card right away. So that was my goal when I made this card.


  • stamp, color (I used Spectrum Noir alcohol markers) and fuzzy cut the coffee pot
  • die cut a frame using two of the rectangle dies
  • cut a piece of pattern paper
  • arrange the card and stamp your greeting
  • decorate your card with a chipboard and some clear perls


Grey (neutral) objects or critters and bright papers are a great combination.

I messed up the heart on the coffee pot. Because I did not want to start all over again, I looked for a way to cover it up and I found out that the tiny circle die with the heart from the "stacked pierced oval" die matches perfectly.

just like coffee - so wie Kaffee / mini Danke - mini thanks / Double Stitched Rectangles / stacked pierced ovals


We love to see what you create. Join out monthly challenge and you have a chance to win a 15 Euro gift card :-)

Have a happy day! 
Thank you for stopping by

Tuesday, September 6, 2016

Laura Sterckx 10k Youtube subscribers video hop

Hello lovelies!

Our sweet friend Laurs Stercks from www.makingcardsisfun.com recently hit 10k subscribers on Youtube and invited us to be sponsor and participant on her viceo hop with the most amazing designers. I feel so honored to be part of this!

Thank you Laura for all your support and your invitation!

10K Video Hop Blog Post Graphic


There are prizes to be won!


How do you win? You have to subscribe to Laura’s YouTube channel (which is a good idea anyway!) and leave comments along the VIDEOS of the hop in order to win the prizes.
The giveaway ends on Monday, September 12 at 11:59 p.m. Central European Summer Time.


I recently discovered a new technique by accident and really wanted to show that. This design was just what got into my mind when I thought about bright colors and bleaching ;)


Check out the video to find out how I created this look:


• You can get a similar look by using glossy photo paper, but the inks dries faster on that and the texture will look different. But it's still worth a try!
• adding just a little glitter on your card can make a huge difference - it's shows that you pay attention to details :)


We're having a call for submissions right now - you can get your crafty projects PUBLISHED in a print magazine! What a great opportunity that you don't want to miss.
Find all the details here:


Now it's time to hop:
Our blog hop is happening over on Youtube, so be sure to head over there! if you’d like to start from the beginning, please go to Laura’s video.