Showing posts with label Die-cuts. Show all posts

Monday, April 25, 2016

Thanks a million

Hi there it's Anja again with some more inspiration for you this week.


Don't you just love the new release? So many different possibilities to use all those great supplies.
For today's card I would like to focuse on those great flowers and the thanks die.
I incorporated different techniques for this card.


I started with a panel from watercolor paper and smooched three different distress ink colors on this paper to create a light background for my card. The flowers are masked and stamped onto some vellum using watermark ink and white heat embossing. I colored the flowers with copics at the back of the vellum so the copics wouldn't interfere with the embossing.
I diecut the word thanks and stamped it slightly offset so you see a little white outline. I stamped with a striped background stamp onto the thanks stamp thus creating the line pattern , saw this technique over at Jennifer mcquire's blog.

I adhered the vellum panel with some doublesided tape behind the flowers. Used some sequins to finish the card.




You can easily color with copics onto vellum when you use the backside of the stamped images. You won't get your usual blending but it gives a pretty nice effect. When you color at the backside of the vellum you won't get any interference with the embossed images and you won't ruin your copics.
There is an easy way to use diecuts with coordinating stamps. First stamp your image. Diecut your die from some scrap paper and use the negative diecut to place over the stamped image thus positioning your die to diecut. you will get a nice stamped diecut this way. In the example from today I first diecut the word thanks and then stamped it. You can see I didn't do a great job but I like the way it turned out slightly offset.


We still want to see all the things you make with our supplies so please link up your projects or join our facebook group. Have a great week; Anja

Monday, April 18, 2016

Sunshine.......

Hi there it's Anja again on this monday. It seems like we are getting some nice weather over here so spring is in the air.
I hope you liked the new release as much as we do and ordered some of those lovely stamps to get creative.

Here is my card for today to give you some extra Sunshine...


As we already mentioned before ,Christine started a new facebook group called ; create a smile friends & family and she places at a regular base some moodboards to inspire you.


So the card for today is based upon a moodboard which you can find on this facebook group.

I again did some inlaid diecutting with the lovely die from the Sending Sunshine kit.


I started with a panel from watercolor paper and did some smooching with distress inks and a swirl stencil. I diecut the icecone die three times and made sure to collect all the pieces. I diecut the icecone three more times out of some watercolor paper and only used the outline to place back into the colored paper. Now for the funpart I placed back all those little colored pieces like a puzzle. To finish of the card I used the chipboard swirl from the kit and adhered some strips of washi-tape. White heat embossed the sentiment on some vellum and placed some sequins.


Stamps;

Served up


Kit;

Sending Sunshine;


When you do some inlaid diecutting make sure you collect all the pieces from your diecutting to place them back. Adhere some doublesided tape at the back of your paper so you can easily place back all those little pieces.


Don't forget to link up your creations over at the side or join our facebook group we love to see what you make with our supplies.

Have a great week;

Anja


Monday, February 15, 2016

Another birthday card.......

Hi, there it's Anja again.
Today I would like to share with you another birthday card where I used stamp stretching.
I guess stamp stretching isn't a word but you know what I mean.


If you know me by now you know I love to stretch my stamps I Always try to use them in an other way. For today I focused on the Doctor's helpers but used the adorable doctor's mice for a birthday card.


I used a kraft topfolded cardbase.
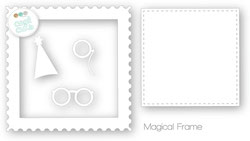
I used a white cardpanel to diecut the frame and placed it diagonal. Stamped the mice with some masking and the little bag. Colored the mice with copics and fuzzy cut it. I diecut several hats from gold glitterpaper and the monocle. Colored a strip of white paper and cut it into a fishtail and stamped the sentiment. Finally diecut the birthday word from gold glitterpaper and rounded the corners of the card.


Stamps;

Doctor's helpers and Mini birthday;


Cool cuts (dies);

Birthday triple and magical frame;


If you don't have the right colored cardstock you can easily make it yourself by either inking some cardstock or coloring it with copics.


Have you seen that Christine has some great acrylic blocks with grids in the store? They are awesome and so easy to use.

Have a great week;

Hugs Anja

Saturday, December 12, 2015

Saturday Scrap Scenes with Terhi - Happy


Hello everyone, it's Terhi here with another Create A Smile scrapbook layout. It's super dark and rainy now here in Finland so I thought to cheer myself up with some bright and springy colors!


I found this gorgeous photo from my camera's SD-card. It has been taken last fall, there's my girls and my mother in picture and I love how sunlight hits their faces. I remember it was late August, so the sun was quite low at evenings, and we had some really fantastic sunsets.
This all reminded me about happy things, light and sun, and that's the way I decided to go with bright color scheme as well.


Please find the video below or watch it here.


Stamps: Time to Say Thanks, Floating Chevrons, Winter Fun
Dies: Stacked Pierced Banners
Other: Sending Sunshine Enamel Stickers, Chipboards - Beautiful,


If you are still wondering how to remember yourself during the holidays, head over to http://www.createasmilestamps.com and check out our latest reveal. It's awesome and definitely something to wrap up!

Terhi xx

Tuesday, September 1, 2015

Surprise!

Hello Crafters!


It's Kelly here and I'm sharing a sweet little elephant card with you today. 


I've had these gorgeous pattern papers from the Sending Sunshine kit since May and I haven't used a single sheet of it. I really wanted to put something together that show cased these gorgeous colors.

I thought it would be super cute to line up the pattern in all the wood grain papers in different layers.
To do this I just lined the cardstock up so that the pattern was facing the same direction. I cut them to the same size so when I laid them on top of each other they were identical. I used two sizes of circles to create a window for my sweet elephant to pop out of. I used the pink paper to trace the circle on to my cardbase. I lined my elephant up with the circle and stamped in copic friendly black ink.


I colored the elephant with copic markers and outlined him with a copic multiliner. I stamped and colored a second set of feet and fussy cut them out. I adhered the teal piece flat to my gray panel. I added the gray panel to the pink panel with dimensional adhesive. I also added my second set of feet with dimensional adhesive.

The enamel accents I used somehow changed color through the magic of photography. :) The "orange" is actually a spot on match for the paper and the blue is really a dark teal. Not sure what happened there!


 Try playing around with the patterns in your paper. You can get a fun look from using the same pattern in multiple shades.


Do you follow us on Facebook?  It's the best way to keep up with all the news! Speaking of news did you see we are now carrying Pretty Pink Posh Sequins in the store?!
Ahhh. I put them on everything :)

Thanks for visiting!


Poppin Over 
Sending Sunshine