Tuesday, May 24, 2016

Aloha Again!

Aloha friends! Keeway here. Did you know that the palm tree die cut in the Beach Party Kit is designed so that you can use it as both a palm tree and a flower? That's got to be the coolest die I've ever seen! And not to mention, there's so many ways to use the die that today I'm going to share with you another idea of how you can use it.


My inspiration spawned from the versatility of the palm tree die cut in the kit. I wanted to use it without the borders in the die cut, so that I can bend and play with the shape of my palm tree as how I see fit to build by beachy card.


I started by die cutting the palm tree out twice from white card stock, and colored it in with copic markers. I tossed out the outline parts, so that I can build my tree without any directional restriction. Now I could have one straight and one bending to the side when I piece the trees back together like legos.

Last but not least, I added coconuts to my palm tree by using a 3/8" circle punch. I copic colored them and added details with a white gel pen.


I blended some warm colors (pink and orange) onto my card base with the waves stencil in the kit to create some soft pattern interest. I also die cut an inverted scallop oval frame to bring my entire scene together. I adhered all the parts directly onto the card base.


Keep your die cut pieces together with some post-it tape to hold everything in place while you color. It will make coloring a lot easier, and when you're done, you can simply remove the post it tape and toss the outline parts away.


Create-A-Smile Products:


There's only a few beach party kits left, and the stamps, dies, and stencil is exclusive to this limited kit. Once it's sold out, it's gone and never coming back!

Thanks for dropping by,
Keeway


Monday, May 23, 2016

Let's create a smile # 5

Hi there, it's Anja again and for today I would like to share with you my interpretation of the sketchchallenge which is going on on our facebook group; Create a smile friends & family.

If you haven't joined us over at this facebook group create a smile friends & family make sure you do because there is lots going on there.


I am addicted to sketch challenges so when I saw the sketch Birka created for us over at the facebook group I simply had to play along.


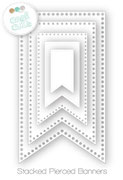
I started with a white topfolded card and sponged the background with distress ink and the stencil from the Beach Party kit. Did some diecutting with the cool cuts stacked pierced banners out of the patterned paper and some vellum.
Adhered these banners onto the card and diecut the palm tree. Stamped that little friend and copic colored it. Some fuzzy cutting and paper piecing and adhered him to the card. Gave the tree some Coconuts with sequins. For the bubbles I used the clear droplets and to finish of the card placed two little banners at the side and did the sentiment with stickers and stamping.
Gave the glasses a realistic look with some glossy accents.


Stamps;

Just because.


Cool cuts ( dies);

Stacked pierced banners.

http://www.createasmilestamps.com/cool-cuts-dies/stacked-pierced-banners/#cc-m-product-12140117723

Kit;

Beach Party kit;


If you get stuck in your creativity try a sketch sometimes it will get you in the right mood.
To keep your card balanced it sometimes helps to use one color and a pop of another color like i did in this card.


Please join in the fun over at our facebook group and try this sketch you have until may 31th to play along we love to see what you come up with.
 
 
Have a great week;
Anja

Sunday, May 22, 2016

White on White

Hi Everyone! Did you order the new kit? If you have not, what are you waiting for? Head over to the store because there's a limited amount of kits available.

White on White. I have not done this in a while and I don't even know why because I absolutely love the result. This card is simple to do and you can do it with anything you have or you can get the same materials that I use with the links at the end of the post.


Very easily, to start, I did a bunch of die cutting. I used the tree die from the Beach Part Kit and cut 5 pieces. Tip : To make the white on white quite seemlessly, it's best to use the same white paper for die cutting and as your card base. The whiteness of the papers will be the same which I think makes it look good. 


I attached the trunk and the top of the tree together with some liquid glue. This really helps me, when I'm trying to position the die cut on my case base, because then you basically only have to move one die cut at a time and not the leaves and trunk separately ;) 


I attached the die cuts to the base with some liquid glue and making sure that I have some die-cut hanging off the card base. 


This is how it looks after I've attached them and cut off the access.


To finish the card, I die cut the sentiment and attached some sequins and a banner. 

All Create A Smile products : 
Beach Party Kit (used the Dies, patterned paper, sequins) 


Follow Create A Smile on Facebook keep yourself updates on all the happenings and if you're an Instagram addict like I am, you can follow Create A Smile using this name : @createasmilestamps ! :)

Thanks for stopping by,


Saturday, May 21, 2016

Aloha!

Hey stampers, Anni here!
Today I want to show you a photo Mr. Rhino took on his last vacation! I can tell you he had a blast!


I had this idea in my mind of Mr. Rhino taking a photo! So that's where it started...


  • Stamp, color with Copics and fuzzy cut Mr. Rhino. Add some Glossy Accents to his swimmings goggles.
  • Die cut the palm tree from white cardstok. Color it with Copics, too.
  • Die Cut an instant frame from white cardstock.
  • Add some ink blending with the stencil to your card base.
  • Stamp and heat emboss the sentiment. Fuzzy cut it.
  • Assemble the card.
  • Add some sequins for some extra fun and some enamel dots as coconuts.

  • It is so easy to make a project from the Beach Party kit  because all the products match so perfectly.
  • Add some scotch tape to the back of the die cuts of the palm tree to keep all the tiny pieces together.


A few member of the Create a Smile Friends & Family started a challenge called one kit - ten cards. Join the fun and use the hashtag #1kit10cards to join.
There are still a few Beach Party Kits available!


Served Up! - Just a litte treat (New DT member!)

Happy Saturday crafty friends!

So happy you're poppin' in to see what's going on today!
Maybe you noticed suring out Kit release that there was a new DT girl in town - woohoo!
The amazing Janine Langer is joining us as a scrapbooking-pro!


She has as amazing CAS style - her layouts are pure perfection and she loves to combine cute images with her photos - Perfect! She has an outstanding sense for design elements, colors and shapes - be prepared for some truly inspiring layouts!

Now it's Janine's turn - enjoy!
And don't forgive to give her the warmest welcome ever! ;)

Have a great day


__________________________


Hello everyone, this is Janine Langer and I am so excited to show you one of my projects for the first time on this blog today! :)


When I saw the Es ist serviert! / Served Up! set, I immediately fell in love with it. Those hippos are so cute, it is unbelievable. And of course I knew I had to create a layout and use them on it, or at least one of them.
I love ice cream, who doesn't? And so the subject was found very quick, as well as the color scheme as I wanted to keep it quite simple to give the hippo more space to shine.


- First I stamped the hippo on Neenah Solar White cardstock with Copic friendly ink.
- With the same ink I also stamped the ice cream on the same cardstock.
- Then I colored the hippo using my Copics. It took a while because I always start with lighter colors first and then add some layers of the darker colors to avoid getting too dark in the end.
- Now I colored the ice cream, which was done quickly.
- I fuzzy cut both of the images, leaving no white border so they would look as part of the background on the finished layout.
- Then it was time to design the layout.
- I printed a digital background paper with my journaling and title on some 8.5x11 inch cardstock.
- Then I die cut two of the biggest Stacked Pierced Ovals set to ground the photograph and to add some interest to the layout by cutting one of them up and only use parts of it on either side of the design.
- Now it was time to adhere everything by using either glue or foam tape to give it some dimension.
- To add some more color, I added two orange circle die cuts as well as some orange splatters.
- Finally I decided to stamp some of the music notes, just for fun and to finish the layout by adding some Neat & Neutral Enamel Stickers in grey.


Take a look at your everyday life. What do you love? What do you eat? All those tiny things are going to make some great memories, don't forget to write them down!

Thanks so much for your time and have a wonderful weekend! :)


Es ist serviert! Stacked Pierced Ovals Served Up!Neat & Neutral Enamel Stickers