Showing posts with label Monster Party. Show all posts

Monday, January 8, 2018

Hooray!!!!!!!

Hello here is Anja again with another card for you in this new year.
I hope you all had some great holidays and are eager to create again, so happy new year and may it be a very creative one.


First I wanted to make a christmascard for my stash since I got very stressed at the end of 2017 when I realized how many cards I still had to make. So for this year I am gonna make at least one christmascard a week. But when I finished the background and took out the monsters I thought it would make a great birthday card so here it is.


I started with the background using the star stencil and the stars stamp. Cut a strip of green cardstock for the sentiment and placed it upon a strip of patterned paper. Stamped the images and copic colored them.
Adhered everything to the panel and adhered that to the cardbase.



Stamps;

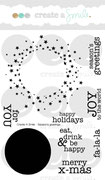
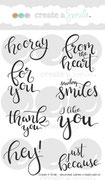
Beast feast, Season's greetings, Decorated wishes mixed add-on and Monsterparty.


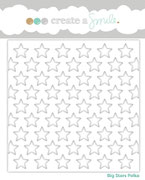
Stencil;

Big star polka.


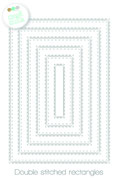
Cool cuts ( dies);

Double stitched rectangles.

Patterned paper;

Sending Sunshine


Sometimes you have to think out of the box and look at your stamps in a different way so you can use christmasstamps also for a winter theme or like here in combination with other stamps for a birthday card.
You can either make your card very colorful but for this card I choosed only two colors which gave the card a more clean and simple look.


Have a great week,

Hugs Anja

Monday, October 16, 2017

Party......

Hi there it's Anja again with another "oldy" card for you.


I needed a birthday card for a boy who loves monsters. I was inspired by a previous card made by my teamie Annika and went for the same design.


I used a horizontal card and rounde the edges.
Stamped the balloon cling stamp and clear embossed it.
Stamped some monsters behind the panel I created with the banner die.
Stamped another monster onto some piece of paper and colored everything with copics.
For some extra interest I gave the monsters wreckles with a white gelpen.
Outlined the panel with a black marker.


Stamps;


Big Time and Monsterparty.


Cool cuts ( dies);
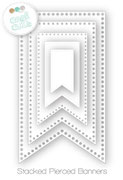
Stacked pierced banners.


Cling stamp

Balloons in the sky;


We love to see what you create with our supplies and join us on all the social media.

Have a great week;

Hugs Anja

Friday, July 14, 2017

Let's Celebrate!

Hi there!
Samantha here today, and guess what? It's my birthday! So you know I had to make a celebration card!! Ha! 


Well...birthdays!!! And that cute cute cute little monster! I couldn't let another day go past when he wasn't used on a card! Ha!


There's nothing fancy with this card, but it sure does make me happy!
Let's make it!

- stamp and color that little guy (I used Zig Clean Color Real Brush Markers and watercolored onto some Bristol Smooth Vellum Mixed Media paper)
- I also stamped a simple balloon from the cling stamp set and colored that as well.
- once dry, fussy cut and add foam tape


- on the background of your card front, stamp the background image in black ink
- heat emboss the sentiment in white, onto black cardstock
- finish with sequins


That monster is SO cute, and totally steals the show on this card! That's why I didn't go crazy with color in the background!


I really let that adorable little monster from Monster Party shine on this card! The background was stamped in black ink with the Cling Balloons In the Sky stamp set! Love it! And that sentiment is from the Mini Birthday stamp set! 


Create a Smile Stamps offers Gift Certificates! It's the perfect gift for someone you know who loves to stamp as much as you do!

~Samantha


Monday, September 26, 2016

More Halloween.....

Hi Folks, I hope you like our new release as much as we do and maybe you have already ordered some of the great stuff.


Although we don't celebrate Halloween over here I love making Halloween cards and with this new release it's such a pleasure and fun. So for today's card I grabbed the Creepy Cute set, which by the way you can also use for a lot of other occasions.


I used a topfolded black cardbase and did some random clear embossing with the diagonal grid stencil. I used the lovely tags M die with kraft cardstock and stamped the cling balloons in the sky with watermark ink and white embossed it. Smooshed some distress ink and placed it on the card with some foamtape.
Made a banner out of orange cardstock and embossed it and stamped the boo prhase several times.
Stamped the little spooky figures several times onto vellum and white heat embossed them and fuzzy cut them.
I couldn't find the perfect purple color to match the fiber so I went for some purple painterstape and white heat embossed the sentiment.
Adhered everything to the cardbase and to finish of the card I used some enamel stickers.


Stamps;

Creepy cute, Monster Party, Big Time.


Cling stamps;

Balloons in the sky


Cool cuts;

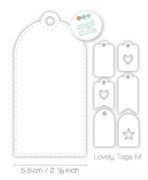
Lovely tags M


Enamel stickers;

Sending Sunshine;


For an interesting tone on tone background use some clear embossingpowder with your stamps or stencils.
If you don't have the matching paper or cardstock try to use some tape which you can also emboss.


You have untill tomorrow to join in the fun over HERE and maybe win our give-away. If you haven't done already please scroll down for the release posts they are full of great inspiration.

Wednesday, September 7, 2016

Video: Create your own Stencil

Hi everybody,

Birka here :-) Today I have a video for you, where I create my own Stencil with da die from create a smile.


I loove this Magical Frame Die. So I was looking for an alternative way to use it.


Here is the Video in english


And here is the Video in german


Try out all your Dies you have, and try different Materials for the Stencil, I'm shure you will find the best way.


If you dont want to build your own stencil, you can find a lot of awesome stencils in the Shop from Create a smile HERE