Wednesday, February 3, 2016

"Bleached" Distress Ink Background with Nina-Marie


Hello everyone and Happy Wednesday! It's Nina-Marie here with you today showcasing our soon-to-be-retired Uplifting stamp set. We have limited quantities left in stock, so be sure to stop over to the shop and pick it up before they are all gone! 



I love distress inks; they are so much fun to work with and you can achieve so many fabulous effects! For my card today I wanted to create a bright and colorful background using Worn Lipstick and Scattered Straw inks, as well as the Create a Smile Swirly Stencil.

I did a "bleaching" technique using water and a baby wipe to create the swirl design on my distress ink background... the effect is beautiful, don't you think?



To see how I created this card, be sure to check out the video below or over on my YouTube channel! If you enjoy, be sure to give it a thumbs up and subscribe... I post new videos every week!


A few tips from today's card to keep in mind when working with your distress inks: 
  •  dry between layers; this will help keep your colors from blending too much and becoming "muddy" or less defined. 
  • when rubbing a baby wipe over the stencil and paper to bleach the color, use a light, circular motion. Rubbing too hard will lift your stencil off the paper, especially if it is a delicate one like the Swirly Stencil used here. 
  • I love shimmer...  and I really love the look of shimmer paired with distress inks! I always keep a spray bottle of Perfect Pearls mixed with water on my desk for adding shimmer and shine to my distress ink backgrounds, watercoloring, blending, etc. Just fill a misting bottle with some water and a couple pinches of Perfect Pearls to create your very own shimmer mists... super fun! 


Don't forget to share your projects using Create a Smile products! There are many ways to connect with us... link projects in the monthly gallery over in the sidebar of the blog, tag us in social media using #createasmilestamps and visit our Facebook and Instagram sites for more inspiration! 

Thanks for stopping by and spending some time with me... See you again soon! 
xoxo, Nina-Marie :) 

Monday, February 1, 2016

Inlaid diecutting...

Hi there, we are already in another new month, how times flies don't you agree?
Well as long as we can create it doesn't matter.
So for today another new card with the lovely supplies by Create A Smile.


Last week I showed you the paperpiecing technique today I would like to focuse on inlaid diecutting.
Since Create A Smile has some awesome dies I would like to use them for this technique.


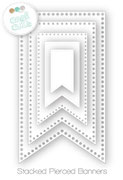
First you have to figure out how you would like do your diecutting. Start with the die that is on top for this card it's the left little bannerdie. Then diecut the big banner and the banner on the right.
Now place all the banners back and diecut the birthday word.
After arranging your layout comes the fun part now you do the same with some patterned papers.
For the inlaid technique you place some doublesided tape at the back of the negative from your diecutting and you can now easily "puzzle" the different pieces together.
To make the word pop I diecut the word birthday several times from white cardstock and stacked it up. To give it more interest I adhered the last patterned paperword birthday slightly offset.
Stamped the hearts beside the diecutting and spattered some ink.
The snail is white heat embossed on some vellum, fuzzy cut and I slightly colored it at the back with some copics.
Place some enamel stickers and round two opposite corners.
Adhere the panel to a topfolded white cardbase.


Stamps;
 
 
Cool cuts ( dies);


Enamel stickers;

Sending Sunshine


When you diecut the different dies make sure you use some paintertape or washi-tape to fixed your dies. To remopve the tape slightly heat it with your heattool and carefully remove it under an angle.
You can also rub your tape on your cloth before using to make it less sticky.
Make sure you collect all your little diecut pieces in a small bowl so nothing gets lost and you may need to use the little parts for the inlaid technique.
As Anika already showed you you can highlight your diecut word by using black cardstock but you can also like I did in this card place your final word slightly offset.
 
We love to see what you do with all those nice dies so please it's another month so you can upload your projects on the sidebar.
 
Have a great week,
Hugs Anja

Get Well Soon!

Hello!

Marika here with my first post for the Create A Smile Design Team, when Christine asked me if I wanted to be a part of this wonderful team I jumped around screaming! I love the cute stamps and wonderful dies that Create A Smile has. For my card today I made a small and simple get well soon card, for when you're in an hurry but really wants to make someone smile. For you who don't know me, I'm a swedish craftoholic and have been blogging about my crafts since 2009 and been making video tutorial since 2012. I love crafting and it's a big part of my life. When I'm not crafting I'm either working, as a full stack developer, or spend time with my boyfriend and my two very cuddly cats.


The idea for this card was that I wanted to try some different size of card and I also wanted to use my dies that I have had laying around. So I matched up the size of my card base to fit with the size of the die, which of course I choose to fit with that darling little mouse nurse.


This card is pretty simple to make, but here is a video showing how I put it together.


When fuzzy cutting, try moving the image and not the scissors. And if you like me and usually makes the same size of cards, try thinking outside the box and play around making different sizes and shapes of cards. For more tips watch the video.


Sunday, January 31, 2016

Experimenting With Colours!

Hi everyone! What is your process of card designing? For me, I have various items that I wanted to try and I just proceed from there. It could be a new product, a new technique, new layout. Today, I wanted to try out a new colour scheme. Colours are so important in this crafting community but sometimes, I tend to overlook colour combination that might not be as obvious or as common.


So, today, I'm experimenting with a couple of colours that I don't usually use together. Hope you'll like it!

If you notice, the die-cut is also cutting through the frame. So this means that, I had die-cut the frame separately first, stuck it on the purple paper and then, took the word die and put it through the machine. This will cut through the purple paper and the frame :) 

I've never used purple and yellow together. I thought it would be nice to have a bright colour peeking out of the die-cut and the corners. You can also substitute the yellow with some glitter paper or even patterned paper! 

This is a simple card with simple construction but my challenge for you is to grab some colours that you might be uncomfortable with and try to start with something simple like this card. 


Create A Smile - Magical Frame Die
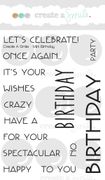
Create A Smile - Geburtstag Triple Dies
Create A Smile - Mini Geburtstag Stamps


Follow Create A Smile on Facebook keep yourself updates on all the happenings and if you're an Instagram addict like I am, you can follow Create A Smile using this name : @createasmilestamps ! :)

Thanks for stopping by,