Friday, April 14, 2017

Hippety Hoppety Happy Easter

Hi there!
Samantha here and with Easter right around the corner, I couldn't resist making a sweet card for this occasion!


Well, Easter is in two days, and I have a Godson who would just ADORE this a card for this day!


Such a fun card to make! The best part was coloring the critters!

- stamp and color your images (I used Bristol Mixed Media Vellum Surface paper and colored the images with my Zig Clean Color Real Brush Markers!)
- once dry, fussy cut and add white accents with a gel pen, where desired


- on a scrap piece of plastic packaging, loosely draw a circle with your watercolor marker and spritz with water
- flip it over and smoosh it onto your card front; repeat that multiple times to create a layered look allowing the colors to blend and spread!
- heat emboss the sentiment onto a strip of black cardstock and add foam tape
- attach all images to your card!


Not into getting messy for your backgrounds? This card could be put onto cardstock, and it would be just as adorable!! Imagine a little floral background? Perfect for the Easter theme!


Oh goodness, I really am in LOVE with these chubby, little, egg-shaped critters! Ha! Everything is from the Eggstraordinary Egghunt stamp set! 


Were you aware that Create a Smile Stamps sells their own acrylic blocks, in addition to all of the awesome alpha stickers, washi, flair, sequins, stencils, dies, stamps and MORE?! They're incredible, and they have grid lines which make them perfect for lining up sentiments!

~Samantha


Thursday, April 13, 2017

Hallo * clean & simple 2/4

Hi there, Nicole here.

I'm back with a second clean and simple card for my April series.


I got asked many a time how I make my clean and simple cards. To be honest, I do not have a recipe. It's just the way I love making cards, it's kind of "natural" for me. But I found some guidelines/instructions for you that might help :-)


If you want to make "clean and simple" cards, try to stick to (some) of these points.
  • one focal point
  • a lot of open space
  • only one (or two) layers
  • no or minimal embellishements
  • minimal color palette
  • simple, uncluttered and easy to recreate

If you want to improve your clean and simple cardmaking, try playing along Clean & Simple challenges. You'll find many inspiring ideas and get to practice at the same time.


  1. stamp your immage on watercolor paper with some Distress Ink
  2. take a waterbrush and color the immage using the color from the edge
  3. fussy cut the immage
  4. use the ink smooshing technique to create the background
  5. stamp the greeting and assemble the card
  6. I used a white colored pencil to fill in the sentiment


Glowing Seaside / nur mal Hallo sagen


Create A Smile is moving and they are taking a break. The shop will be closeduntil May 7th.

Thanks for stopping by! See you soon :-)


Wednesday, April 12, 2017

Spring Greetings

Hey stampers, Anni here.
Today I have some gift boxes to show featuring the set Kroküsse/Crokisses.


Last weekend I met some crafty friends that I wanted to give a little gift. So I made these small gift boxes and put some sweets in them.


I stamped the crocuses with Versamark a few times on watercolor paper and embossed them in white. I colored them with ZIG Clean Color Real Brush pens and fussy cut them.


For the box I used a die and cut them from patterned paper. I finished up the boxes by adding a sentiment, also embossed in white on a stripe of matching cardstock.


Create a Smile is moving and the shop is closed at the moment.


((VIDEO)) Stencil Techniques with Distress Oxide Inks

Hello crafty friends! It's Jess and today I have a card and a video with the Nautical Stars and Big Hearts Polka stencils.


I recently got some Distress Oxide inks and a new stencil from Create a Smile so I decided to play with them together. I also used one of my favorite older stencils from Create a Smile.


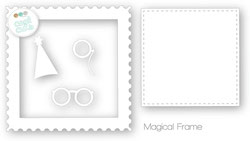
After creating my backgrounds I decided to use a large sentiment from Decorated Wishes. I think the Magical Frame die cut offered a great way to make the sentiment pop.


It's fun to see what you can create even with just 2 colors of ink.


Create a custom matching die cut by using the ink to color the cardstock.


Big Hearts Polka Stencil

Decorated Wishes Stamp Set

Nautical Stars Stencil

Magical Frame Cool Cuts


The Create a Smile shop is closed and moving but will reopen on May 7th!

Monday, April 10, 2017

Eastercards # 5


Hi there it's me again with two more eastercards.


Since it will be eastern in a couple of days I had to make some more eastercards to send to friends.
And ofcourse I once again used the lovely eggstraordinairy egghunt stamps.


For this first card I used a topfolded white cardbase and diecut the lower third part from the frontpanel.
Adhered some patterned paper at the inside of the card.
I stamped and masked two bunny's and fuzzy cut them, colored them with copics.
I diecut the monocle with the die out of pink cardstock and stamped the little bow and colored it. Adhered them onto the bunny's and smooched some distress ink at the background.
Adhered the bunny's to the cardbase and rounded the corners.

For the second card I used the negative paper from the fuzzy cut bunny and I drew an egg form around it.
Used a topfolded cardbase and white heatembossed the random stamped sentiments.
Adhered the egg to the cardbase and gave the bunny a tail.
Rounded the corners of the card to give it some extra interest.


Stamps;

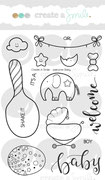
Eggstraordinairy egghunt, Welcome baby and aus dem Hut gezaubert.


Cool cuts ( dies);

Magical frame


We love to see what you come up with and join in the fun in our monthly challenge.
The store is closed for the moment but will be reopened May the 7th so stay tuned.

Have a great easter weekend and a great week.

Hugs Anja

Sunday, April 9, 2017

Make Your Own Background - Part 1

Hey crafters! How have you been? Still going with Background as the main theme, I thought I share a couple of weeks on how you can make your own background panel without the use of stamps. 


To make the colourful background, I've cut out a couple pieces of hill-shaped borders to use as a mask and I use my distress inks to make the colours. To be honest with you I was very happy with the background and I felt that I might have ruined the card with my failed white splatters. 

In between the hills, I've draw a line of glitter using the Clear Wink of Stella and also on the branches and leaves. 


Follow Create A Smile on Facebook keep yourself updates on all the happenings and if you're an Instagram addict like I am, you can follow Create A Smile using this name : @createasmilestamps ! :)


Thanks for stopping by,