Monday, February 22, 2016

A neutral look.......

Hi there it's Anja again on this monday at the beginning of a new week.
For today I have a card for you created without having an idea where it should lead me....




I don't know about you but sometimes I really have no idea what card to make. I sit down and just start and look where it will lead me. So for this card I started with a white panel and stamped those leaves randomly on the card. I wanted to highlight the right area without using coloring so i embossed the dies for some extra interest. From there on the card was build up just by experimenting. I think I am satisfied how it turned out at the end.



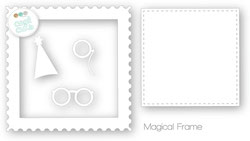
As I mentioned before I started with a white panel and randomly stamped the leaves. I used a grey memento ink because I first wanted to color the images. I decided to leave them blank and highlight the area by embossing with the magical frames die. I stamped some flowers on vellum and white heat embossed them. Did some fuzzy cutting and arranged them onto the card. The sentiment was white heat embossed onto some red cardstock and placed upon the arranged flowers. Placed some white embroidery thread behind the flowers for some extra interest. Adhered some clear droplets ad random and finished the panel.
I wanted a bit more color and decided to use the colors of the panel with strips of red and dark grey cardstock. Placed it all onto a topfolded white cardbase and thus finished my card.




Stamps;

Botanical Love and Magical Flowers.


Cool cuts ( dies);

Magical frames;


Sequins;

pretty pink posh clear droplets;


When you have no idea which card to make just sit down and start stamping a background with a small image and see where it leads you. often you get the idea by just playing with your supplies and trying new things.
To pull a card together try to bring back the colors in your card by using strips of paper or just a little accent in the colors of your card.


We love to see your creations so place them in the sidebar.

Have a great week;

Anja

Sunday, February 21, 2016

Watercolouring A Stamp

Hi everyone! Sometimes, one small image is more than enough for a card. For this card, I wanted to make something that only uses one image but at the same time make the card look "full". Watercolour is a big hype for a while now and I am a big fan. I hope you like this card!


To share with everyone that just one image can help to make a card look "full". Sometimes, I'll be on a budget and I try not to buy everything that comes out because I can't afford to keep buying everything. So, this is when I'll take the time make full use of my stamps and doing something like this can give a stamp a different look. 

I wanted to have a freehand watercolouring look and for this I always use the Antique Linen Distress Ink because it's one of the lightest ink I have. Distress Ink works well with water so you won't see any obvious ink lines anymore. 

I used a Daler Rowney paint set for this watercoloured card. Instead of just painting the shell or face with one colour and few shades of the same colour, I added some brown to the green. This gives more texture to the shell and it doesn't look so "flat". And I really like how it turned out. The beauty of watercolouring is that you can achieve this look easier than if you use copics/pencils.


Create A Smile Stamps - Lovely Critters
Create A Smile Stamps - Kleine Worte 


Follow Create A Smile on Facebook keep yourself updates on all the happenings and if you're an Instagram addict like I am, you can follow Create A Smile using this name : @createasmilestamps ! :)

Thanks for stopping by,


Saturday, February 20, 2016

Sending You Bear Hugs

Hi, Anni here! Hope you have a wonderful weekend!


I wanted to use this cute little bear from the set Made of Snow but I didn't want to make it a winter related card! Without the bodies the critters work perfectly for anytime of the year!


This is an easy card to make:

  • Stamp, color and fuzzy cut the images.
  • Add some ink blending to your card panel.
  • Stamp the sentiment and add the missing word with alphabet stickers.
  • Assemble the card.

  • If you don't have the sentiment you need in your stash use alphabet stickers. They are perfect to emphasize a word, too!
  • The ink blending is a great way to anchor your images.
  • Just for the extra little something add Glossy Accents on a few areas on your card.


We LOVE to see your creations using Create a Smile products! Add your link to the sidebar! You have the chance to win a prize!


Saturday Scrap Scenes with Terhi | Flowers Are Forever


It's Terhi here sharing a layout with flowers, flowers and again flowers.


Some time ago I decided to create a bouquet of paper flowers. I wanted to learn how to fold some flowers from paper and created this gorgeous and timeless flower bouquet with no mixed media. Big projects like this, it took the whole day to finish it, are not exactly my thing, so I'm very proud of myself I did this!
And as usual, if something makes me feel good, it must be scrapbooked!


As you might have noticed, I'm not very experienced with coloring stamps. So to make it easier, I made it as a learning experience, I embossed some flowers on the background. So much easier to stay behind the lines when the line is higher than the paper. Next thing to learn is how to create shadows and use other coloring techniques - I'm sure my team mates have made a lot of material to learn with.


Please find the video below or watch it here.


Stamps: Botanical Love, Crystal Letters Upper
Other: Feel Good Sentiments Flairs


Even if you feel like cardmaker and you know your style, try something once in a while. It will make your mind fresh - and if it's not a real success, at least you feel more confident in your own area of crafting.


Terhi xx

Friday, February 19, 2016

It's Your Birthday!

Hi there!
Samantha here, and today I'm sharing a card that I hope will make you smile! :)


I always find I'm short on birthday cards, so when I set out to make a card, this time, I knew it was going to be a birthday card! And what's better than an adorable penguin to say happy birthday?! Ha! :)


To create this card, I started with my Distress Inks! :)
- press the Distress Inks (Squeezed Lemonade and Dried Marigold) onto your craft mat and spritz with water
- press your card front into the watery, colory, goodness and then lift up
- set aside to dry
- stamp and color the penguin and cloud images with copics and fussy cut


- adhere the clouds and pop up the penguin onto the card front once dry
- stamp the sentiment! 


I used the adorable Penguin Party stamp set and the AMAZING Mini-Birthday stamp set - I just LOVE that mini set! 


When I first colored the images, I actually colored the parachute and belt in greens! Yes, greens!! Can you IMAGINE how that looked? Ha! Well, to me, it didn't work AT ALL with the rest of the colors, so I just stamped the image again and colored only the belt and parachute and attached those right on top of the other colored areas! Easy fix! 

Shhh...here's a secret - the Penguin Party stamp set is ON SALE right now! Yes! Be sure to snatch one up! There are a few other sets on sale too (as well as other embellishments!) - click here and fill up! 
Thanks again for spending some of your precious Friday with me!
  

Wednesday, February 17, 2016

Gifting things

Hello!

Todays card is a gift card card, perfect for maybe a day at the zoo?


My inspiration behind this card was a swedish artist called Bokkei, I've been following her for years and she was the one that got me into playing with markers and later coloured pencils. The latest project she been working on was pencils on grey cardstock and I knew I just needed to try making a card the same way.


This card is pretty simple to make, but here is a video showing how I put it together.


To figure out how I wanted to colour the turtle I googled turtles and then picked the one with the coolest patterning. Reference images can be really handy both for refreshing your mind how somethings look like, or give you ideas on colour schemes.


