Hi there!
Samantha here, and today I am sharing a cute little Christmas card!


As soon as I saw those horizontally striped trees, I knew I wanted to make them like candy canes!! (Honestly, my first thought was rainbow...but then came candy canes! lol!)

Let's make this card together!
-
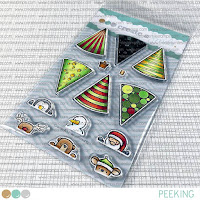
first, I stamped colored all the images with Zig Clean Color Real Brush Markers and
then once they were all dry, I fussy cut them out!
- I used
Distress Oxide Inks in Blueprint Sketch, Mermaid Lagoon and Cracked Pistachio to add the ombre colored background

- then I used the stencil and some white embossing paste to add the textured stars! loooove that stencil!
- I made sure to stagger the trees, so they weren't all the same height

- I heat embossed the large scripty phrase in black onto vellum and then fussy cut it out! Then, I heat embossed the rest of the sentiment in white onto a strip of black cardstock!

I went with complimentary colors for my card, but this would be just as beautiful with tone-on-tone colors, as well!


There is ALWAYS a fun challenge going on in the Create a Smile Stamp Facebook group page! It's fun and filled with prizes! I love seeing all of the incredible, unique and amazing inspiration!


