Tuesday, July 31, 2018

A Magical World

Hi everyone and welcome back to our creative space! 
Raluca here with a brand new card showcasing two awesome stamp sets from Create a Smile Stamps shop.


I absolutely adore the cute unicorns from the "SuperPowers" set and I wanted to create a dreamy scene for them.


* On a watercolor cardstock I painted a pinkish sky using some cheap watercolors and added white splatters all over it.
* I die cut the watercolored panel using the largest stitched rectangle die and adhered it to a white card base. 
* Next I die cut from white cardstock and from vellum some clouds using a cloud border die and mounted them on the panel.


* On the top cloud border I stamped and heat embossed a sentiment from the "Friends Like You" set. 
* Next I stamped the unicorns and colored them using Spectrum Noir markers.
* After I fussy cut them I mounted the images on the card using craft foam.
* I glued a few iridescent sequins and my card was done.


Cool Cuts Double Stitched Rectangles


If you love Instagram like I do, you can follow Create A Smile using the name @createasmilestamps and if you have any questions about card making, techniques or products, if you want to share your creations with Create A Smile fans or if you want to participate in our monthly challenge join us on our Facebook group Create A Smile - Friends & Family :).

Have a lovely Tuesday!
Thanks for stopping by,
Raluca


Sunday, July 29, 2018

Creating A Scene (Part 2) - July Release!

Hi Everyone! I'm not great with creating a scene when it comes to using a cute scene stamp set but I do like to take some elements of the set to create a mini scene that I generally enjoy. I hope this will inspire you to use the set in different ways.


This beautiful set is called Scene Builders and I've only taken out the hot-air balloon and the clouds of this set. I've coloured them with a mix of Distress Inks/Markers and prima watercolours. 
I've actually started create a gradient blue background but after sticking down my images, you can no longer see the gradient. But sometimes that's just how it goes right? I still like how it turns out and perhaps I will give this look another try next time. Has this happen to you before? 

Anyways, I've also used one of the rectangles from the Double Stitched Rectangle set and I think the stitching lines from the die matches the stamp set super well! 


To finish the card, I've added some stickles here and there and a beautiful sentiment from the Decorated Wishes set. I thought of stamping it in black but a white embossing sentiment gave it a more softer look. 


Double Stitched Rectangle set
Decorated Wishes set
Scene Builders


Follow Create A Smile on Facebook keep yourself updates on all the happenings and if you're an Instagram addict like I am, you can follow Create A Smile using this name : @createasmilestamps ! :)

Mail Call : Christine is looking to decorate her office with your beautiful Create A Smile cards creation. Send your cards to Merremstr. 21, 47053 Duisburg, Germany.


Thanks for stopping by,

Friday, July 27, 2018

Tinted Embossing Paste on a Card

Hi there!
Samantha here, and today I have this cute little guy to share with you!


Guys, that frog is SO cute! But the real reason I decided to make this card...is those mushrooms!!! I think they are adorable! Ha! And I am in LOVE with the fact that there are 3 different sizes!


Let's make this card together!

- stamp and color your image (I used Zig Clean Color Real Brush Markers) 
- once dry, fussy cut and set aside
- on your card front, use the stencil and some embossing paste
- I tinted my embossing paste with a light grey ink by smooshing the ink onto my Kraft mat, mixing in a tiny bit of embossing paste, and then smearing that through the stencil


- I heat embossed the sentiment onto a strip of black cardstock

- then popped up the sentiment strip and the frog image with foam tape!


You could finish off the card with some glossy accents over the rainboots - I totally thought of doing that! Rainboots should be shiny and fun!


That cute little frog with his mushroom patch are all from the Unfrogettable stamp set. The stencil I used is the Big Stars Polka Stencil!


Have you joined our Facebook Group Community? The Create a Smile Friends and Family group is such a fun group complete with challenges and daily inspiration! 


~Samantha


Friday, July 20, 2018

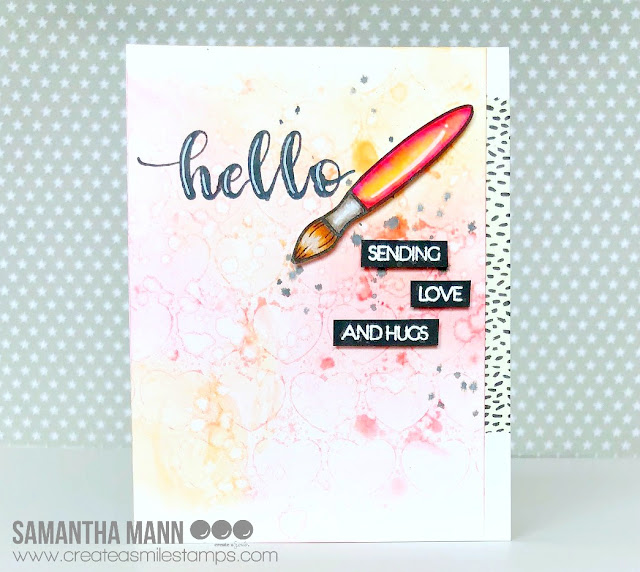
A Hand-Lettered Hello

Hi there!
Samantha here, and today I'm sharing a cute little card that is ready to mail and cheer someone up! 


Well that's the goal anyway! It's always nice to get a sweet card in the mail! It just lets that person know that you're thinking of them! 


Let's make this card!
- stamp and color your image (I used Zig Clean Color Real Brush Markers), once dry, fussy cut out!
- on the card front, add a light layer of Distress Ink to the stencil itself (I used Worn Lipstick and Dried Marigold), spritz with water and press down onto the cardstock
- once dry, add a light layer of distress ink blending around the background and splatter some water on top


- once it's all dry, stamp your sentiment, and add your paintbrush image!
- I also added some black strips of cardstock with a longer sentiment
- add foam tape and adhere it all to your card


I have to admit, this card didn't turn out 100% like I  had envisioned! I went a little lighter in the background, and I think that's bothering me a little! I'm usually a 'bolder is better' kind of girl! lol!


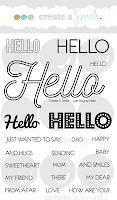
I used the First Day of School stamp set, and part of the title was created with the Clear Lettering Alphas, while the other part used the Just Saying Hello stamp set! I also used the Big Hearts Polka Stencil!


There is always a fun challenge going on in the Create a Smile Friends and Family Facebook Group!
Check out all the details and play along, we love to see what you make! 


~Samantha


Winners from the Special day challenge

Hello everyone!

Here are the winners from the challenge Special day! We had beautiful entries and the ones that caught our attention the most :

Kaja with this absolutely adorable card using Cart full of treasures . Congratulations Kaja please sent an email at challengeteam@createasmilestamps.com to claim your prize and feel free to add the winner badge on your blog!


We also liked very much the card that Anja created using our Triangles stencil


Congratulations! Feel free to add the badge on the blog .

Thank you everyone for playing along with our challenge, and don't forget there is a new challenge going on and the theme is Water  make sure to check it out and play along for a chance to win a 25€gift certificate to Create a smile store !


Wednesday, July 18, 2018

We dare you to create a smile - Water edition

Hi everyone!

Hope you are enjoying the nice weather and you still in the mood of creating cards, because is time for a new challenge here at Create a smile challenge and the theme is :


 We are so happy to share with you what our guest designers created for our challenge!

Kerstin made this amazing card using Beach Party kit and Treasure Chest cool cuts


Sandra created this cool card using Gull gang stamps set and Ocean waves cling stamp


Thank you so much for creating such beautiful cards and for guest designing for our challenge!

Now lets see what our team created!

Alexandra created this adorable card using Under the Sea stencil and Lovely critters stamp set 


Ashlee created this stunning card using All hands on deck stamp set


Ellenor created this beautiful card using Gull gang stamp set


Giada made this cute card using Dress me up stamp set and Waves stencil


Ksenija made this adorable card using Gull gang stamp set


Laura made this awesome interactive card using Beach party kit  and you can also check her video here 


Sindhu created this cute card using Gull gang stamp set


Hope this amazing projects inspired you to create some cards and play along with our challenge! Don't forget you can win a 25€ gift certificate to Create a smile store  and also a guest designing spot for our next challenge!

Please make sure to read the rules and most important have fun!