Saturday, September 28, 2019

Don't Worry, Bee Happy

Hi there!
Samantha here, and today I'm sharing a cute, super fun, encouragement card!


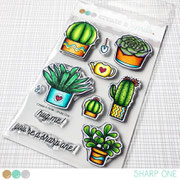
I am in LOOOOOOOVE with those bug images!! I think they're the CUTEST things ever! And I really wanted to explore a little about stretching the images! This time, I used the little banner sentiment for them to sit on, instead of the branch!


Let's make this card together!

- I started by stamping and coloring the images with Zig Clean Color Real Brush Markers! 
- once they were all dry, I added some details with a white gel pen, and then fussy cut them out
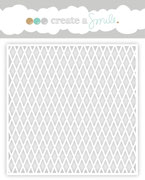
- I used Chipped Sapphire, Mermaid Lagoon and Peacock Feathers Distress Inks to create the background. 
- Then I splattered some water, and ink onto the background to give it some texture and the feel of 'stars'


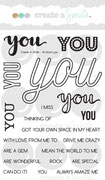
- Next, I heat embossed the large, scripty phrase in white onto some vellum, and then fussy cut it out
- I added it to the background with foam tape! I also added foam tape to the banner phrase and the bugs!
- The clouds were adhered directly to the background
- and something you can't really see, the top part of the card is actually 3/4 inch shorter than the back of the card! The stripes are on the INSIDE of the card! such a fun little detail!


I love the look of the big scripty words heat embossed on vellum, and then fussy cut out! It allows me to pop it up, even though adding the foam tape can be quite time consuming! Ha! 
If you prefer, stamp that large phrase directly on your card front!!


I used three different sets for this card! I could use those cute bugs from Best Bugs every day - they're ADORABLE! Those cute clouds in the background are from the Paw Prints stamp set. And the sentiment is from the Don't Worry stamp set!


There is ALWAYS a fun challenge going on in the Create a Smile Stamp Facebook group page! It's fun and filled with prizes! I love seeing all of the incredible, unique and amazing inspiration!
~Samantha


Thursday, September 19, 2019

Winners from Sketch challenge


Hello everyone !

Time to see the winners from our latest sketch challenge . Me and the DT girls we had a hard time to choose our favourites as so many amazing entries were this time! Thank you so much for playing along with our challenge ! We are so happy to see all your different takes on our challenge themes .

Also wanted to let you know that by playing along with our challenge you get the chance to win a 25€ gift certificate to Create a smile store and to be guest designer for our next challenge!
Without further due our winner is Debby with this gorgeous and elegant card that she created using Cool cuts Birthday triple Cool cuts Coffee Collection


Congrats!!  please send an email to challengeteam@createasmilestamps.com to claim your prize ! Is so well deserved !

Our featured artist from this challenge is Nancy with this wonderful card using  Floral decorations stamp set


You can take the badge and display it on your blog is so well deserved !


This are our picks from the sketch challenge! Make sure to play along with our next challenge for a chance to be our next guest designer ! 
Until next time have a great day!

Wednesday, September 18, 2019

Good Morning


Hello crafty friends, it's Kerstin here!
Today I have a little diy tutorial for you.


I am always looking for gift ideas. And this is an idea I found on pinterest a while ago.


  • gather your supplies: a porcelain cup, your favorite stamp sets and stazon ink
  • make sure your cup is clean and your stamppad is juicy
  • place your stamps on a sturdy ground (outer part of the misti or your glass media mat for example)
  • ink up your stamps
  • after that place some stamps without ink around the other stamps
  • roll your cup with light pressure over the stamps
  • fix the image by heating in the oven (180°C) for about 40 minutes
  • and you're done


A Fresh ink pad is necessary but when it's too juicy your cup might slip away. And if you maken a mistake, you can wipe the image away and start over again.


Thanks for stopping by and happy crafting,
Kerstin

We dare you to create a smile : Mood board

Hello everyone

It's time for another mood board challenge and we have some beautiful color to inspire you in creating your projects.


Also don't forget that by playing along with our challenge you get the chance to win a 25€ gift card to Create a smile store and the chance to be guest designer for our next challenge 


As usual our design team rocked this mood board inspiration , let's see what they created 


Anita created this adorable card using Best bugs stamp set


Hope you got inspired and now is your time to be creative!
Please before entering your project make sure to check the rules which are listed below


You are invited to the Inlinkz link party!
Click here to enter

Saturday, September 14, 2019

Winter Wishes

Hi there, Nicole here, with a cozy little christmassy card for you.


I'm slowly thinking about making christmas cards but at the same time I'm not really in the mood for santa and christmas trees. So what I do is, I use unusual colors and stamps that can be used for christmas but also for other occasions, like... they don't scream christmas to me.


For this card, a stamping tool like the MISTI comes in super handy. I used the stamp with the graphic design that looks like knitting and stamped it repeatedly, three times to be exact. The pattern has some blank spaces and an additional small stamp to fill them. So I took a small acrylic block and stamped the little shape in some of the gaps with another color.

Next, I stamped the bird with water resistant ink and colored it with Faber Castel Watercolor Markers. I cut him out and adhered him to my panel using foam tape. I filled the other gaps of the knitted pattern with white sequins and stamped my sentiment with a crisp black ink. To finish up my card, I added some glitter on the star using Wink of Stella.

This is a clean and simple card that you can use for fall, winter or christmas. It has a cozy feel to it and a little sparkle too because of the star.


If you are like me and want to start early with your christmas card making but you're not into santa and christmas trees yet, go through your stash and look for other stamps and dies that can be used for christmas cards and use them with a non traditional color combo.


Aus meinem Nest (also available in English "From my Nest")


Mix & Match Patterns


We always love to see what you create! Join our fun challenges and show us your creations.

Thanks for stopping by!
Have a wonderful day,
Nicole


Wednesday, September 11, 2019

You Always Amaze Me!

Hi, Candice with you today.  I hope you have all settled back into the school routine, I know it has been really quiet in my home lately!

Today I am sharing a card that could brighten anyone's day!


I created this special card for a new, and AMAZING crafty friend, oneallgirlstudio, who wanted to send each other some love.  If you haven't tried reaching out to crafty friends, try it and lets send some love to each other!


I started my slimline card with an 8 1/2 x 3 1/2 card base.
-I first created the background using the diamond stencil with fired brick, riped persimmon, carved pumpkin, dried marigold & scattered straw oxide inks.
-I made the frames by die cutting multiples and layering to give depth.


-Next, I stamped the cacti, colored with copic markers, and fussy cut out. 
-For the small sentiment, I heat embossed in white on a stitched banner.  I then stamped the large you in black and cut out.


This was my first time using two completely different colors with my copic markers on the tips of the cacti.  I love the results and will be brave and try it on other images again!  Give it a try and share with us your results on Create a Smile IG!


You can always join in the bi-weekly challenge for your chance to win!

Thank you for visiting!

Candice