Wednesday, December 23, 2015

Color Bursts Background


Hi everyone! Francine here! Today, I’m back with a video tutorial. Here is my project:


This time, I want to share how to create a fun  and colorful background using Color Bursts. Color Bursts are watercolor pigment powders that react with water.


Watch the video to find out how the card was created:



Stamps: Letters & Perfect Tune (Create A Smile)
Inks & other mediums: Ken Oliver Crafts Color Bursts "Orange" and "Alizarin Crimson", Black Licorice Hybrid Ink (My Favorite Things), Versamark, Copic markers, Wink of Stella Clear Glitter Pen
Paper: white cardstock (or watercolor paper)
Various: 3D foam pads, washi tape, white embossing powder, anti-static powder tool, bone folder, scissors, trimmer,tape, heat gun, etc. 


You can sprinkle Color Bursts onto the background and then spritz them with water. But you can also add water first and then sprinkle Color Bursts over it.

If you spritz a small amount of water, the background will be more vibrant. With more water, it will be softer.

You can always add more powder and/or water. Don’t forget to experiment and try to create multiple layers.


Don’t forget to share your Create A Smile creations with us! Upload them right in the sidebar. 

Thanks for stopping by! I wish you a MERRY CHRISTMAS!


Monday, December 21, 2015

Last minute........

We are only 4 days away from Christmas so here are some last minute tags/cards I would like to share with you.


I don't know about you but somehow I always have to do some last minute cards or giftwrapping tags for Christmas. So for today I would like to share with you some spinnertags I made to go with some christmaspresents.


I first diecut 4 banners out of white cardstock. Two of them I inked up using two different stencils. Next I stamped the two images and to create the spinner I mirror stamped them also. Did some quick coloring and fuzzy cut them. Diecut a circle out of the banners and placed some thin wire between the images and the two banner diecuts. To finish it up I diecut the little banner out of white cardstock and placed it on top. Some ribbon and twine and an embellishment and stamped the sentiment.


Stamps;

Cool Buddies, Make a Wish and Smiling Snowflakes.


Dies;

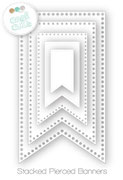
Stacked pierced banners.


Stencil;

Nautical stars


In the past we have showed the mirrorstamping before but just a reminder it's very easy you can either use some big solid stamp or some transparancy to stamp your image you want to mirror and then stamp it on your paper.
When you diecut the circle out of your banner make sure to tape it and the two banner diecuts together so you will have a matching diecut circle.
Here I used a rather thick wire when you use some thinner wire the image will spin easier.

Have a great week and a very merry Christmas.
Thanks for stopping by,

Anja

Sunday, December 20, 2015

A Bunch of Hearts

Hey everyone! Did you catch the new release? If you didn't, I'm here to share with you a card I've made using one of the sets. Also, if you didn't know, the first kit that was released, Sending Sunshine, is still available! I'm gonna use one of the items in the kit for this card. So if you didn't get a chance to get it the first time round, head over to the store :) 


This card is where I mixed it the old and the new. Hopefully, this will inspire you to take a look at your older products and see how you can mix it with your new stuff.

When you look at the card, it's fairly obvious how I did it but I hope you'll still read on as I'll add in some tips along the way. 

I started off by colouring in the hearts with copics. Obviously, I'm not an expert on copics but I did find that to get a nice blended look, I, sometimes, touched the tip of the markers so that I could achieve the middle colour. Hope you get what I mean. 

Here's what I used an "older" product. I wanted something to attract the sentiment. I looked through my stash and realised that I have not used this chipboard from the Sending Sunshine kit. In the middle of the chipboard, there's a word sunshine but I cut it out so that I could use the "messy" circle. 

To add the gold (that I love), I die-cut the word using the Kleine Worte die using a strong metallic gold paper. I'm so obsessed with this paper. I got it from a local store (no brand was written on it). Added the rest of the message and dots of gold stickles and that was it! 


Create A Smile - Sending Sunshine kit
Create A Smile Dies - Kleine Worte
Create A Smile Stamps - Color Your Heart Out
Create A Smile Stamps - Ein Riesiges Danke
Ranger Gold Stickles
Copic Markers


Follow Create A Smile on Facebook keep yourself updates on all the happenings and if you're an Instagram addict like I am, you can follow Create A Smile using this name : @createasmilestamps ! :)

Thanks for stopping by,


Friday, December 18, 2015

Embellishing With Enamel Dots

Hello there! I have recently been loving these enamel dots as embellishments on my cards. They are so quick and easy to add and they give the card some fun texture and dimension.


Today's video will show how to use the enamel dots in creative and fun ways on your cards and craft projects. I will be making two Christmas tags using the awesome Snow Buddies stamp set.

I was inspired and challenged to use these enamel dots in many different and unique ways. They add so much to your cards!


To start out, I stamped the two groups of penguins and snowmen onto the tags using the MISTI to get a complete image. I then colored them both in using Copic Sketch Markers with very simple blending. 


Then, I stamped a fun background using two blue inks and snowflakes. I love to create my own backgrounds with those extra small stamps that come in the stamp set. But, you could also mask off the penguins and stamp a snowy background stamp onto the tag.


Next, I stamped the sentiment "Merry Christmas" using the MISTI to align them onto both tags below the penguins and snowmen. 

Then, I added the enamel shapes onto the beaks of the critters. You are able to color the enamel shapes with Copic markers to make them darker if needed. I also added the to the background and onto some of the snowmen accessories. 


Finally, I finished of the tags with an assortment of different twines and tied them through the holes at the top. 

Enjoy the video!