Showing posts with label Nautical Stars. Show all posts

Wednesday, April 12, 2017

((VIDEO)) Stencil Techniques with Distress Oxide Inks

Hello crafty friends! It's Jess and today I have a card and a video with the Nautical Stars and Big Hearts Polka stencils.


I recently got some Distress Oxide inks and a new stencil from Create a Smile so I decided to play with them together. I also used one of my favorite older stencils from Create a Smile.


After creating my backgrounds I decided to use a large sentiment from Decorated Wishes. I think the Magical Frame die cut offered a great way to make the sentiment pop.


It's fun to see what you can create even with just 2 colors of ink.


Create a custom matching die cut by using the ink to color the cardstock.


Big Hearts Polka Stencil

Decorated Wishes Stamp Set

Nautical Stars Stencil

Magical Frame Cool Cuts


The Create a Smile shop is closed and moving but will reopen on May 7th!

Monday, December 21, 2015

Last minute........

We are only 4 days away from Christmas so here are some last minute tags/cards I would like to share with you.


I don't know about you but somehow I always have to do some last minute cards or giftwrapping tags for Christmas. So for today I would like to share with you some spinnertags I made to go with some christmaspresents.


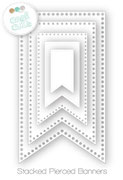
I first diecut 4 banners out of white cardstock. Two of them I inked up using two different stencils. Next I stamped the two images and to create the spinner I mirror stamped them also. Did some quick coloring and fuzzy cut them. Diecut a circle out of the banners and placed some thin wire between the images and the two banner diecuts. To finish it up I diecut the little banner out of white cardstock and placed it on top. Some ribbon and twine and an embellishment and stamped the sentiment.


Stamps;

Cool Buddies, Make a Wish and Smiling Snowflakes.


Dies;

Stacked pierced banners.


Stencil;

Nautical stars


In the past we have showed the mirrorstamping before but just a reminder it's very easy you can either use some big solid stamp or some transparancy to stamp your image you want to mirror and then stamp it on your paper.
When you diecut the circle out of your banner make sure to tape it and the two banner diecuts together so you will have a matching diecut circle.
Here I used a rather thick wire when you use some thinner wire the image will spin easier.

Have a great week and a very merry Christmas.
Thanks for stopping by,

Anja

Tuesday, December 23, 2014

One Stencil: Two Cards

Hello Crafters!

Can you believe we are only 3 days away from Christmas?! I'm not even done shopping. :/ I guess I better get moving huh? Hopefully, you all are a better prepared than I am!

Today I created two cards for you using the Nautical Stars Stencil.


I really wanted to show how versatile these stencils are. I decided to do two cards in the same layout, with the same stencil, but completely different looks. 


For the elegant card I used repostionable adhesive to lay my stencil down on white cardstock. I "smooshed" my Versamark Ink pad over the top, removed the stencil, an heat set with silver embossing powder. The stark white wasn't really working for me so I added Evergreen Bough Distress Ink over the top of the embossing. I used the same distress ink to color the border strips and sentiment banner. The sentiment was heat set in white and some teal pearls finished the card off. 

For the second card I used distress inks with my stencil to create the background. I think these stars are perfect for a fun birthday card background. The monster and balloons were colored with copics and fussy cut. I just drew in the strings once they were adhered to my card base. 

You can use most ink colors, especially distress ink, to custom match your paper colors to your ink. If you decided to color your paper with distress ink make sure it's completely dry before attempting to heat emboss a sentiment. Distress ink stays wet longer and your embossing powder WILL stick to it. I always do a test before stamping my sentiment. Trust me, save yourself the frustration :) 

Thanks so much for stopping by! Before I go . . .


Whoo Hoo! Sale starts December 24!! You can shop here

XoXo
Kelly

White Cardstock
Black Cardstock
Silver Embossing Powder
White Embossing Powder
Copic Markers
Teal Pearls
Distress Inks: Evergreen Bough, Salty Ocean, Crushed Olive