Showing posts with label nur mal hallo sagen. Show all posts

Saturday, August 10, 2019

Hello, how are you?

Hi there, Nicole here with a rainbow card that says "Hello, how are you?"


When I started making cards, I had just a few stencils and did not know what to do with them but now, many years later, I just love playing with them. So I wanted to make a card using this Huge Polka Dots Stencil.

I also got inspired by a YouTube video by Cathy Zielske


  • put some masking tape on your panel 

  • lay your stencil on top and stick it to your working surface with some washi tape

  • start ink blending with a light hand

  • remove the stencil and the masking tape

  • stamp a large greeting over the gap between the two ink blended parts

  • decorate the card with small stamps and twine 


  • gridlines on your work surface are super helpful to put on the masking tape straight
  • some of the colors would turn into a muddy brown when mixing them, so that's where the masking tape does a wonderful job by keeping them apart.  


Nur mal Hallo sagenHuge Polka Dots Stencil / Bear Mail (auch in Deutsch: Bärmail)


We love to see what you create, so make sure you tag us on Instagram using #createasmilestamps or share your cards on our FB Group called "Create A Smile - Friends and Family".

Thanks for stopping by!
Have a colorful day,
Nicole

Wednesday, June 19, 2019

Sunflower

Hi there, Nicole here with a flower card inspiration for you.


I got some new watercolor markers by Faber Castel a while ago and was playing around quite a lot with them. I wanted to try no-line coloring with them and that's how this card started.


  • stamp your flower with Antique Linen Distress Ink on watercolor paper
  • add some color with your watercolor marker (any watercolor marker will do) where you want your shadows to be
  • add water with a water brush or a paint brush and let the colors fade out to create some depth
  • continue to add color to the shadow areas 
  • for the background I used a stencil and moved it after every layer of ink blending (details on the pictures below) I did three layers using two shades of green Distress Inks
  • die cut your panel using a rectangle die
  • adhere your flower to the panel using foam tape
  • stamp your sentiment in a matching green ink, I used Distress Oxide Ink


  • if you find it difficult to add dark colors to the small shadow spots on your card with a brush, let your coloring dry and add the shadows with some color pencils.
  • moving your stencil around can create new and fun looks


We have fun challenges for you to play along! Check out the blog for the bi-weekly challenge or our Create A Smile Friends & Family Facebook Group for the monthly challenge.

Thanks a lot for stopping by!
Have a wonderful day,
Nicole

Thursday, October 18, 2018

pastel fall card * time lapse video

Hello crafty friends, Nicole here.

Today I have a pastel fall card for you and a time lapse video of my cardmaking process.


I love fall and it's typical fall colors but I also love pastel colors. That's how the idea of making a pastel fall card came up. I also struggle including green in my cards. If it's not grass or leaves, I have a hard time finding colors that go along well and/or I like, so I challenged myself to use green as a focal color.


  • stamp, color and fussy cut your frog and some leaves
  • mask off the sky and ink blend the ground. I used a light brown Distess Ink
  • mask off your ground and ink blend the sky. I did not spread my blue color evenly because I wanted to create the illusion of soft clouds.
  • die cut your panel with a scalloped rectangle die
  • stamp the greeting
  • adhere the frog and the leaves with glue and/or foam tape (I used both)
  • (optional) draw some lines and tiny dotts with a black pen to make it look like wind


In the video you can see some of my creative process. I thought about using a stencil and tried out a background stamp, I search for a nice color combo for my background, I go through my stash of sentimens and I try several positions for the little leaves as well. 


  • I used three leaves because odd numbers are pleasing to the eye
  • Ink blending a sky does not always have to be one flawless blue panel. Sometimes, a more "messy" or uneven ink blending adds some interest to the sky.
  • adding small hand drawn details can spice up your clean and simple card. Practice on a scrap piece of paper or use a pencil first (if you're scared to ruin your card by drawing on it).


We're on Instagram @createasmilestamps and we LOVE to see what you create!! Share your cards, paper creations or hauls using the hashtag #createasmilestamps 😀😀😀

Check out DT member Kerstin's last card. It's very similar to mine (we did not plan this 😉) but still different. The colors are more vibrant and she picked die cut leaves and painted a soft watercolor background.

We would love to see you're fall cards using Create A Smile stamps and dies! Play along our fun challenge! One lucky winner will get a gift card to the store!


Thanks for stopping by!
Have a wonderful day,
Nicole

Saturday, October 13, 2018

Hello and a hug

Hello crafty friends, it's Kerstin here!

Today I have a cute fall card for you featuring one of my favorite stamp sets.


We had a long and warm summer and I really enjoyed it. But now it's time for the another wonderful season: fall! A good reason to start creating fall cards.


  • stamp and color your favorite critter and fuzzy cut, if you love to
  • create a background in a loose watercolor style and if you're like me add some sprinkles
  • die cut some leaves from the cool cuts pocket tag set and color them as well
  • glue the leaves on the ground and in the air (like falling leaves)
  • add a sentiment and be careful not to ruin it 


If you messed up part of the sentiment (like I did) you can stamp or heat emboss on some vellum, cut it out and glue it over the ruined sentiment.


Clear Cool Buddies     Clear Nur mal hallo sagen     Cool Cuts Pocket Tag


... if you want to share your creations with us on Instagram don't forget to use #createasmilestamps


Thursday, May 17, 2018

clean & simple ideas 7/7 * darling details

Hello crafty people, Nicole here.
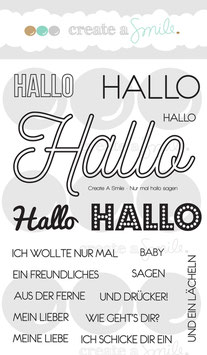
This is part seven of my clean & simple cardmaking series about "how to spice up clean & simple cards"I originally planned 10 posts, but this will be the last one for now. 

For todays card I went for a graphic rainbow look. The sentiment says "hello, how are you?".


Clean and simple cards are super fun but because there is so much white (or blank) space on them, you don't want them to be boring, right?! I made a little series about my favorite ways to keep clean and simple cards interesting :-)


My last tip is DARLING DETAILS. We all have tons of tiny stamps that we just don't use that much. But they are so cute and you can make awesome cards with them.

Just go through your stash and pick those little stamps and see what you can do with them.

Here are some cards I made in the past... All of them are quite simple but the small stamps just gave them a little extra.


 for the card on the top
  • draw some lines with a ruler and a pencil
  • stamp the little stamps in lines, start with the bigger stamps and the lightest ink colors
  • I used dye inks
  • errase the pencil lines
  • glue some thin paper stripes between the stamped lines
  • stamp your greeting
  • add some sequins


Stamp sets: Going Graphic, Just Saying Hello / Nur mal Hallo sagen


We LOVE to see what you create! Join us on Instagram using #createasmilestamps :-)


Thanks for stopping by!
Have a happy day :-)
Nicole