this is my last video before Christmas, and I'm one week too late, I had soo much christmas-stress... but now its ready and I hope you will like it.
One evening in bed I had the idea of this kind of card... and I forgot it.. hihi.. but lucky me, two days later it came again into my mind and here it is: my outside-pop-up-card :-)
As usual, first some pictures....
I thought, the most of the pop-up-cards had thier action inside. But I wanted to create a card, standing like a card, but having its action in front of all
You think this year is nearly over? But no, we will have another last Release this year ;-) stay tuned for getting some sneak peaks along the next days ;-)
I have two quick and easy masculine christmas cards for you today.
I realized that most of my christmas cards were cute but I needed some masculine ones as well. And because it's December already, I needed them fast. So here are two quick and easy cards I made using watercolors, embossing powders and Distress Oxide Inks.
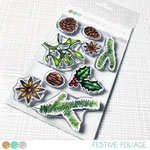
Card no.1 - mistletoe
stamp the mistletoe on watercolor paper with a crisp black ink that is a bit sticky and cover it with clear embossing powder. Heat set the powder with your heating tool.
color your image with watercolors or watercolor markers and let it dry
use a blending tool to add Distress Ink to your panel. Start with the lightest color on the edges and get super light towards the middle to create a halo. Add a darker color of Distress Oxides to the edges to create more depth.
sprinkle on some water drops to add a bit of texture/interest to your background.
stamp the greeting in crisp black ink
stamp some little stars with the lighter Distress Oxide ink to add a finishing touch
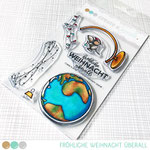
Card no.2 - globe
stamp the globe and the stand on watercolor paper with a crisp black ink that is a bit sticky and cover it with clear embossing powder. Heat set the powder with your heating tool.
color your image with watercolors or watercolor markers and let it dry. Make sure it's completely dry, so the embossing powder for the next step will not stick to your entire image
stamp the stars and lines with a sticky clear ink and heat emboss it with gold embossing powder
add a little watercolored shadow underneath the stand
stamp the greeting in a matching dye ink or Distress Oxide ink
Clear embossing powder over black ink helps you to stay in the lines while coloring with watercolors if you need to be quick
for me, watercolors or watercolor markers are easier to use if I want to do some quick coloring (projects with alcohol markers or colored pencils take me much longer)
vintage colors like these warm brown tones give your stamped image a cool retro look
gold embossing powder adds a bit of festive bling without being too much
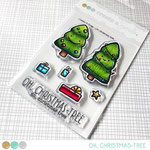
Hey everybody! Chris back with you today with some inspiration for a Christmas Card. For this card I "mixed-up" some stampsets.
In the last few days, I saw some mistletoe decorated front doors so I tried to use this inspiration for a Christmas card.
it´s very simple to do
the front door is a cut file (Silhouette Design Store) and I cut it out with my Plotter
stamped all images and colored them with Distress inks and Alkoholmarkers
for the gift package with the sentiment I stamped a part over a "Post-it" and then extended it manually
for more contrast I glued down a colored Panel which I blended out with some Ink Pads
then arranged all images on the card and glued down with 3D-Pads
For this door I used my Plotter, but I think you can create your own door without a Plotter.
And with some masking-techniques it´s possible to "strech" some images for your need.
Maybe you are looking for a present for a crafty friend (or yourself) - how about a gift voucher from Create a smile Stamps?
Thank you so much for stopping by and happy crafty time. Chris