Monday, July 25, 2016

All Hands on Deck.....

Hi there it's Anja, again with another card for you.


As usual I wanted to combine different sets to create one card.
So after diving through my stash of sets I decided to go for these used sets.
I really like the outcome of this card.
 
I started with a white cardpanel and stamped the sentiments from the set in different colors and did some repeated stamping. I created the little rhino with some masking and copiccolored it and fuzzy cut it.
I adhered the scene over the stamped background and gave it some ground with copics.
 
 
Stamps;


We love to see what you create with all the lovely supplies so please share them with us.

Have a great week, so you next time,

Anja

Sunday, July 24, 2016

Lovely Tags Part 2

Hi everyone! Today, I'm sharing with you another card feature one of the tag dies. For the next couple of Sundays, I'll share different looks using the new Lovely Tags Dies. Let's jump in!


I love shaker cards. I'm not an expert at it but sometimes, I do like making them. Many dies are great to create windows for the dies and the bigger tags in the tags die is one of them. 

You can, of course, use the die as a tag and I'm looking forward to use it just as it in the next weeks. 

Anyways, the shaker card is pretty simple and if you would like a more detailed tutorial, let me know and I'll do it for the next time. 

So, I used the heart dies to create as a border of the shaker window. 

The older stamps used in this card is also on discount so if you would like to get a hold of them before they are gone, run to the store now :D


All Create A Smile products : 


Follow Create A Smile on Facebook keep yourself updates on all the happenings and if you're an Instagram addict like I am, you can follow Create A Smile using this name : @createasmilestamps ! :)

Thanks for stopping by,


Saturday, July 23, 2016

Hey Landlubber!

... that is what the german sentiment of my card means.
Hey stampers, Anni here!


When the new release was laying on my craft desk before me I couldn't decide what to play with first. But the koala is just too sweet so I went with him.


  • After creating the background by ink blending with Distress Ink and a stencil, I added some clear embossing powder and embossed the background. The Distress Ink ist still wet enough to hold the embossing powder and the effect is awewome in my opinion.
  • The new tag dies are perfect for adding sentiments to your card. They add just the extra little something.
  • I love to use warm greys for furry critters. I think that's a great color for animals.


Don't forget to play along in both of our challenges: the one on the blog and the one in our Facebook group. They are great prizes to be won.


Friday, July 22, 2016

Watercolor Underwater!

Hello again!
Samantha here with you today, sharing another cute little, under the sea card! (I think they're my favorite!)


I just can't stop playing with the new July release! So I took out my Zig clean color real brush markers and had some fun!


So, let's start the fun and create this card!

- on a piece of watercolor paper, stamp your image and watercolor with your favorite type of watercoloring tools! I used Zig Clean Color Real Brush markers for mine!
- get out a card front for your card, a scrap piece of packaging (from stickers, sequins, etc) and some Distress Markers
- scribble the Distress Markers onto the packaging, spritz with water and press to your card front! Continue this until you like the background you have created! I used Blueprint Sketch, Peacock Feathers and Tumbled Glass for my 'ocean'.


- heat emboss the dot outline in gold and stamp the sentiment
- pop up the jelly fish and add a strip of contrasting washi tape under the card front!
- sprinkle on some gold mist to finish it off!


The good thing about using the 'packaging technique' when creating a background is that you never get the same design twice! This is my go-to way to create water backgrounds - i just LOVE it!! 


I combined an older set with the new Glowing Seaside stamp set! The older set I also used was Bad Day

    
Be sure to stick around and keep a close eye on Create a Smile next week...it's the EPIC July release!! 
~Samantha


Thursday, July 21, 2016

Birthday Koala

Hello everyone, Nicole here!

As you may know, I'm the newest member of the design team and I'm super happy to be a part of it. This is the first card I have for you. 


I need a lot of birthday cards for the upcoming months and I wanted to use the cute koala from the brand new stamp set. 

  • do some ink blending on a white piece of paper (start adding the color in the middle and work your way to the edges by adding less color as you go)
  • use a stencil and white pigment ink with a sponge dauber to create the background 
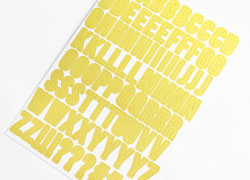
  • die cut some tags and add the alphabet stickers on top, die cut the grass border
  • stamp the koala and mask off his eye patch and his hand with the saber
  • stamp the top part of the cupcake (about two-thirds) and draw the hand and the second eye with a fine, black waterproof marker
  • color the koala (I used my Zigs) and add Glossi Accent to his nose
  • add two eyelets and add the twine with the tags, secure the tags with foam tape
  • add the koala using foam tape, stamp the greeting and add a die cut heart 


Stretch your stamps by masking of parts to change the theme. Maybe you want to check out your christmas stamps and see what you can do with them throughout the year. :-)


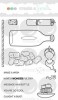
All hands on deck / Alle Mann an Bord

Alphabet Stickers

Big Heart Polka

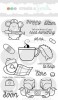
Lovely Tags M

Served Up / Es ist serviert


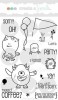
Hey Quatschkopf


It's Create A Smile's birthday this month and you can still enter the monthly challenge.

Have a lovely day!
Nicole


Wednesday, July 20, 2016

Caught A Bug?

Hi!

Marika here with a new card, today I've choosen to use more neutral tones for a get well soon card. I had so much fun pulling out a whole bunch of different stamp sets for this, and also playing with my favourite background technique right now which is ink smootching.


Todays card came out of a want of using some distress inks that I haven't used, and also to do a more neutral card and not just bright pinks and blues, even tho I love those colours too! Also wanted a little play on words as the sentiment said a bug I wanted a single little monster in my bottle.


The techniques behind getting this result is quite easy and here is a video on how I did step by step.


Ink smootching has been my go to background technique for a while, it's so much fun and your backgrounds will always look different. My tip is to relax, and to let the ink take you where it wants to go. If you want a more controlled look you can use a brush and brush on the colour, but I really love the texture you get from the smootching. Also different papers will take water and ink differently, experiment with different papers and you'll find your favourite one, mine is Canson 300 gsm.