Seiten

Tuesday, February 28, 2017

My friend

Hey stampers, Raluca here! Welcome back to our crafty space!
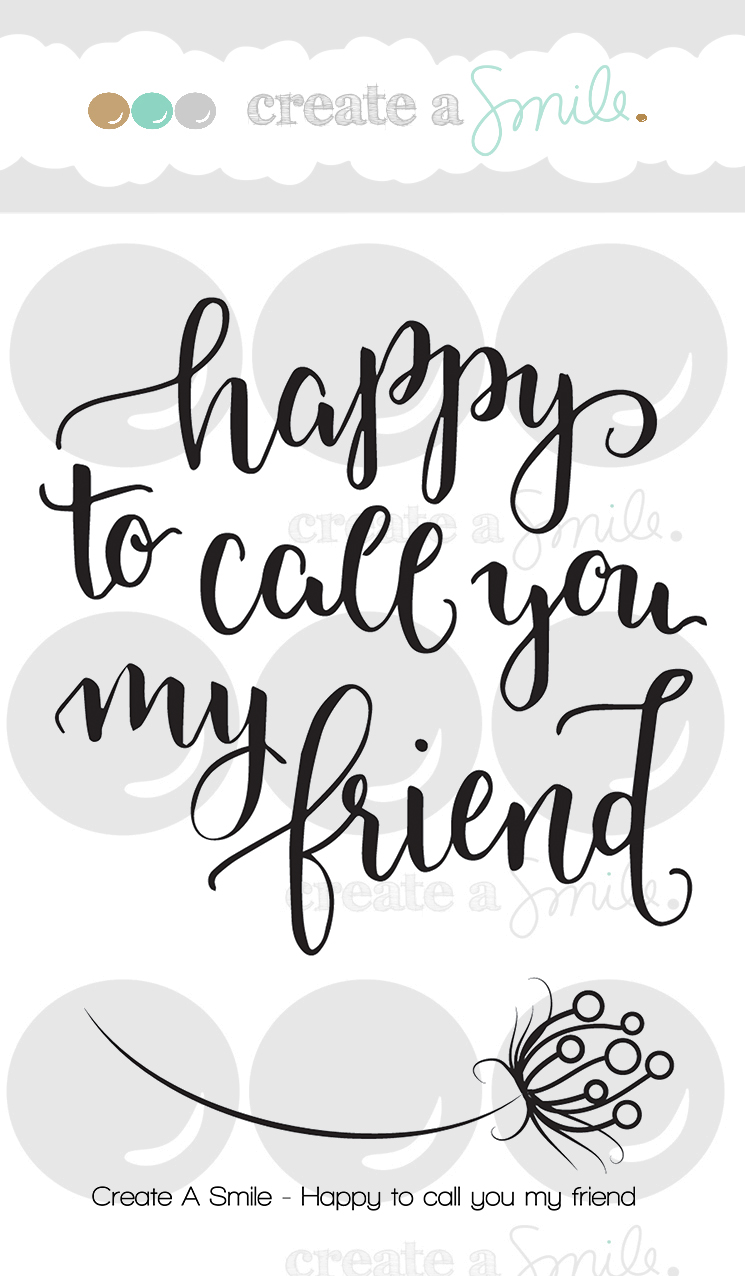
Today's card is featuring the "Happy to call you my friend" mini stamp set.


I love plaid patterns and I tried making one myself using some alcohol markers in warm pastel colors. I really liked how it turned out so I decided to make a card with it.


 I decided to go with this big sentiment so I stamped it using VersaMark and I heat embossed it using rose gold embossing powder. I also stamped the flower from the set with a light pink ink pad. Then I die cut it with an oval die. I mounted the oval on a bigger oval die cut from vellum. I adhered the ovals on the plaid panel and the panel on a white card base. To finish my card I added some clear sequins and some yellow Nuvo Crystal Drops on the flowers. 
I really hope that you like it and that you'll give it a try.


If you love Instagram like I do, you can follow Create A Smile using the name @createasmilestamps and if you have any questions about card making, techniques or products or if you want to share your creations with Create A Smile fans join us on our Facebook group Create A Smile - Friends & Family :).

Have a lovely Tuesday!
Thanks for stopping by,
Raluca


Friday, February 24, 2017

Watercolored Vellum

Hi there!
Samantha here, and I wanted to share a fun way to get a watercolor look on vellum!


I first saw this technique on this video here! You're definitely going to want to check it out! 


This card was so fun to make, and surprisingly easy!
- ok, so first, tape down a piece of vellum and scribble on the vellum with your choice of Alcohol markers (I used Copics!)
- once you have lots of color on your piece of vellum, spritz it with rubbing alcohol and move the colors around with a paintbrush that has the rubbing alcohol on it, too.
- let it air dry, it won't take long


- on your card front stamp the flower images in a black ink
- once the vellum is completely dry, heat emboss the large sentiment in black ink
- stitch the vellum onto the card front


You could create a similar look to this card by watercoloring directly onto the cardstock, in the traditional way, and then laying a layer of vellum on top! 


The bold sentiment is from the Just Saying Hello stamp set and the gorgeous flowers are from Magic Flowers! LOVE! 


I am super addicted to washi! Did you know that Create a Smile Stamps sells washi tape, too? Oh yeah! 


~Samantha


Thursday, February 23, 2017

from the heart

Hello crafty friends, Nicole here.

I was in the mood for one of my favorite stamps from Create A Smile :-) That turtle is just so cute, right?!


My cute turtle needed a happy fresh ocean. So I went for watercolors and that pretty "sophisticated shells" stamp. 

  • paint some watercolor on watercolor paper, I did several layers
  • let it dry
  • stamp the backgroundstamp over it with a sticky clear ink and add white embossing powder
  • stamp the turtle on watercolor paper as well by using a clear sticky ink and white embossing powder and color it with watercolors
  • stamp the greeting and assemble your card
  • decorate your card with clear drops that look like water and some glitter :-)


There's more than one way to add a water drop look on your cards. 
  1. You can glue on some "clear droplets" by Pretty Pink Posh.
  2. Use "Nuvo Crystal Drops - Mornig Dew" to add clear dimensional drops
  3. Take your "Glossy Accents - Clear" and add little dots. You will not get much dimension but the water drop look still works
I even added some glitter glue along the shell shapes to make my water sparkle.


Dekorierte Wünsche/Decorated Wishes / Lovely Critters / Sophisticated Shells / Double Stitched Rectangles


There's still time to play along the current challenge! :-)


Have a happy and colorful day!
Thanks for stopping by
Nicole

Wednesday, February 22, 2017

Sending Sunshine

Hey stampers, Anni here!
Today's card is featuring the Sending Sunshine kit - the very first kit by Create a Smile.


I am so ready for summer, aren't you? I needed a little bit of summer feeling in my life - even if it is just on a card!


  • The banners on this card are perfect for using up your scraps - be honest, we all have them in our stash!


Tuesday, February 21, 2017

Creative friends

Hi everyone! Raluca here with a fresh and spring card using the "Magic Flowers" stamp set.


I love coloring so I look through my stash to see which flowers I haven't colored yet and I saw this beautiful flower. On that moment I decided to make a card with it.


I stamped the images using VersaFine Onyx Black Ink and I colored them with alcohol markers and colored pencils. Then I fussy cut them. On a white panel die cut with the largest stitched rectangle I used the "Diamonds" stencil with Peacock Feathers Distress Ink. I added some white splatters for a bigger effect. On a strip of black card stock I stamped and heat embossed in white the sentiment from the "Friends like you" stamp set. I assembled everything and I added a few clear sequins and my card was done.


I hope you got inspired and that you'll add this beautiful set to your stash. There are so many gorgeous flowers in it.


Magic Flowers


If you love Instagram like I do, you can follow Create A Smile using the name @createasmilestamps and if you have any questions about card making, techniques or products or if you want to share your creations with Create A Smile fans join us on our Facebook group Create A Smile - Friends & Family :).

Have a lovely Tuesday!
Thanks for stopping by,
Raluca