Seiten

Sunday, May 31, 2015

Rainbow Waves - Altering Chipboards

Hi all! Did you know that Create A Smile has quite a number of chipboards in the store? Today I would like to share a really simple but colourful card using one of the chipboards. Hope you like it!


I love finding ways to stretch the use of my products. Altering products is one way :) 


I started out my heat embossed the Wild Waters background set in gold embossing powder. I've masked away thick borders because I wanted to have that thick frame look. 


I used my watercolour to colour the spaces between the waves. To make it more dimensional, I made sure to have some dark shades for each colour.


To embellished, I used the Word Bubble chipboard with the word "hello". But if you look at the product, the word is in a speech bubble. I didn't want that. Because this is chipboard, it was really easy to snip away the speech bubble part :) I coloured the word in black to make it stand out even more.


Create A Smile - Wild Waters Background Stamp
Create A smile - Word Bubble Chipboards
Watercolours
Watercolour Papers


I used a detailed sharp scissors to cut the chipboard because it was small and soft. A thick scissors might not work very well :) 


Follow Create A Smile on Facebook keep yourself updates on all the happenings and if you're an Instagram addict like I am, you can follow Create A Smile using this name : @createasmilestamps ! :)

Thanks for stopping by,


Marina

Saturday, May 30, 2015

Christmas in May

Hello, Anni here!
I konw everyone is waiting for the summer to come but today I have a christmas card for you.


I challenge myself to make two christmas cards per month. I hate it to get in stress when december arrives and I LOVE to make christmas cards. Again I was inspired by the colors of the kit - can't get away from it.


To create the background I drew some diagonal lines with a pencil on my paper because I wanted a more graphic pattern. I know I wanted to add some watercolor so I didn't want the background to get too busy.
Then I stamped and heat embossed the snowflakes from the Set Smiling Snowflakes. After that the fun part: Adding the water color! I love it!


Maybe you can see that I am always trying to repeat colors on my card: You can find the coral color in the scarfs and noses of the snowmen, in the enamel shapes near the sentiment and I used a coral cardbase. The silver embossing of the sentiment is repeated in the sequins. In my opinion this ties the card together. Just the soft blues and aquas of the background are just in one spot. For the background it is ok, I think.


We are having a guest designer call! Play along!


Saturday Scrap Scenes with Terhi - Beautiful


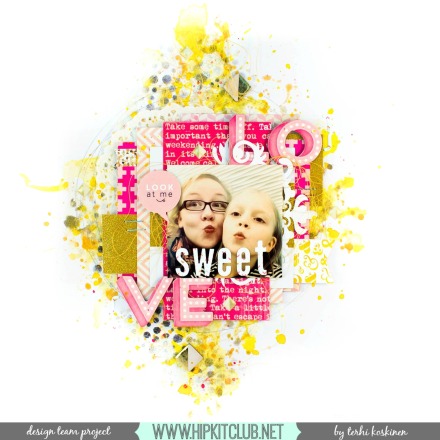
Hello everyone, it's Terhi here with my first Create A Smile scrapbook layout.


I got my inspiration from the 'beautiful' chipboard word, as I thought it goes perfectly together with the picture of my younger daughter. Both elegantly beautiful, and I love the texts' font. The mint green washi tape gave me inspiration as well - didn't need to wonder about the color scheme.


Please enjoy my process video - http://youtu.be/UtAJaF9SgZw.


Stamps: Arrows
Other: Sending Sunshine Enamel Stickers, Mint Drops Washi Tape, Chipboards - beautiful


If you ever have thought how much you adore the scrapbook layouts you've seen, but never tried to do one: Just try, right now! 
You don't need nothing more than a photograph and your card making supplies. Enjoy the process, it's so much fun.


We are having a Guest Designer Call - get your submission in before June 5th!

Thanks for stopping by!

Friday, May 29, 2015

A Monstrous Birthday

Hello!
Samantha here today, and I have a super fun birthday card to share with you! :)


It's super fun and super easy to create for a fun little one in your life!


This card really came together super easy! And there is no fun story, or technique behind it...it just came to fruition because I had fun playing with that cute little monster!


So, settle in, and let's create this card together, shall we?

- on the white card front, spray with a gold/yellow mist
- once dry, add white embossing paste over the stencil, set aside to dry
- stamp and color the balloons and monster with copicsS
(this is the fun part!)


- i added some glitter with my wink of stella pen and then added glossy accents over the balloons
- i popped up both colored images and the banner for the sentiment
- oh yeah! the banner - i heat embossed that sentiment in white and hand cut the banner!
- lastly, add a think strip of washi to ground the whole scene!


That hysterical monster (i just LOOOOVE his expression, ha ha!!) is from Big Time. The sentiment and balloons are from Monster Party, and the awesome starry background was created with the Waves of Stars stencil!


This card was super easy! You could easily create a set of these and give THEM as the birthday gift! win-win! I love the idea of coloring the background and monster in different colors (wouldn't a pink mist behind the stars look awesome!?).


Show us what you got!! Link up your Create a Smile projects for the chance to be a July Guest Designer!! Yay!! You can find all the details and the linky here!

Thanks again for stopping by!
~Samantha

Thursday, May 28, 2015

Special announcement: There's a new Team Member!

Hallo everyone and happy thursday!

I am so thrilled and happy to announce that we added a new member to our little family-like team. She's one of my all-time-favorite scrapbookers and will bring some inspiration your way that is full of layers, artsy, colorful and always well balanced.
She'll post some Scrapbooking inspiration for you every other Saturday and she'll make your heart skip a beat.

Please give a super warm welcome to


When I first saw Terhi's layouts on Instagram  I was wowed. I've never been a scrapboker and I never may Layouts myself, but her art just made my hearts sing. Her style is completely diferent from mine - with all her layers and so many techniques on one project - but she makes everything go together so well - and it looks so easy the way she does this. Absolutely inspiring.
So I am super happy she's now joining the team to show you what Create A Smile can be for Scrapbookers.

Here are some of her recent projects, to give you an impression of her one-of-a-kind-style:


Stunning, right?
(That last triangle layout was the project that made me click the susbcribe button some months ago ;) )

I know you're all kind of curious about who this girl is:
Let's get to know Terhi a bit:

Terhi Koskinen, 28, Finland.

Hi, Terhi nice to meet you! Take a seat, get comfy. 

Okay, you know why youre here: People want to know everything about you. Lets start with something simple:
Youre a paper crafter. When did you start and how did it happen?
I started about four years ago. I’ve always loved photographing and a friend of mine showed her scrapbook pages – did not need to think twice, my soul was sold immetiadely for beautiful papers and stories around the pictures. 

What kind of projects are your favorite? And why?
Scrapbook layouts are my passion as layouts combine my love for photographing and beautiful designs. I also love to do canvases, altered items and sometimes cards and art journals pages, too. Cards comes as a by-products for me, I often find my desk covered with scraps and leftovers and as environment-friendly person, I don’t want to throw anything away so I do cards or tags to give away for friends. You might call me mixed media artist, but I don’t like to put me into any box.

Is there one technique that you use more often than others?
Yes there is: doodling in every possibly way and adding thread to everything. I do love trying out new techniques all the time, and I often find myself doing the same technique ten times and then I forget it. But doodling and thread are my „trademarks“.

If you look at other peoples projects: What amazes you and what makes you frown?
Many things, and one thing I love in the world of papercrafting is how much talented people is in it! I can surf on Instagram for hours and my husband keeps asking what am I doing as I‘m sighing and smiling all the time.

Youve been paper crafting for quite a while. Is there a lesson you learned that youd like to share with our readers?
Wouldn‘t say a lesson, but keeping your eyes open and seeing beautiful and inspiring things in everyday life is something I treasure and appreciate.

Lets get to something personal. You live in Finland, whats your favorite spot there and why do you think people should visit this place?
My home and my tiny studio ;) No, to be honest it would be the whole Finland with its pure nature and pure air. Even in the middle of Helsinki, our capital, you’ll find clean parks and can feel totally safe. 

What is a characteristic that describes you the best?
(Weird) sense of humor, loyalty, positivity.

What else should people know about you? Any secret addictions? Obsessions? Fun stuff?
People should know that like every girl, I was once a horse lover, too. Usually it is a phase, but my horse obsession continued and continued – we have two lovely mares in our family.

Thanks for the interview Terhi, Im so glad and honored you joined our little Design-Team!

_____

Terhi will be sharing her first Create A Smile project this saturday. So make sure to check back.

Now it's time for YOU to check out her Blog, Instagram channel and leave her lots of love.
Thank you everyone - this is going to be great!


Wednesday, May 27, 2015

Iridescent watercolor background

Hi! Francine here! 
I’m back with a new video tutorial featuring the Create A Smile stamp sets called Botanical Love and Ausflippen (German sentiment set). Here is my card:


In this video, I share another way to create a self-made background using silver embossing powder instead of the black or white we usually choose. It gives a fantastic metallic look! 

Sadly, the pictures don’t do justice to the card! In real life, the background is vibrant and shiny! 


You can see how I did my card in the video below!


Stamps: Botanical Love & Ausflippen (Create A Smile)
Inks & Co.: Peacock Feathers Distress Ink (Ranger), Finetec MICA Watercolor Iridescent Paint, Versamark
Paper: watercolor paper, black and white cardstock
Dies: Stitched Rectangles (Lil’Inker Designs)
Various: silver embossing powder, 3D foam pads, tape runner, heat gun, paint brushes, etc.


Use Distress inks combined with iridescent watercolors to create a metallic and shiny look.

Combine a silver embossed background with gold iridescent watercolor shades for more contrast.


Thanks for stopping by and have a wonderful day!