Seiten

Saturday, February 28, 2015

Personalize Your Card!

Hey stampers, Anni here, it's Saturday again and it's my turn to show you a card!


A good friend of mine gave birth to a baby boy (his name is Mads) this week and I wanted to make a personalized baby card for her. I think it's the benefit of being a crafter that you can send cards that were made especially for one special person.


  • Stamp, color and fuzzy cut the digger.
  • Die cut the name of the baby from patterned paper.
  • Stamp the sentiemnt on another piece of patterned paper.
  • Adhere the digger, the letters and the piece of PP to a panel of paper.
  • Add a piece of PP to your card base and assemble the card.


In the inside of the card I added the birth date of the boy!
There are other ways to personalize your card: 
  • Think of the favorite color of the person you are making the card for! 
  • What hobbies does he or she have? 
  • Put the age on the card if you are making a birthday card!
  • Is there an insider joke you are sharing? Use it as a sentiment!


Create a Smile is a sponsor for the Spring Coffee Lovers Blog Hop. There are amazing prizes! Hop over to take a chance!


Friday, February 27, 2015

Coffee Lovers Spring Blog Hop - Love you more than Coffee

Hello!!!!
Welcome and thank you for stopping by for the Coffee Lovers Spring Blog Hop!!!


Create a Smile is another SUPER sponsor for this hop, and it's so very exciting!! We will be giving a way a mixed package of coffee related Chipboards and we know you'll crate amazing things with them :) Enter your project to the Coffee Lovers Blog Hop Linky at the Coffee Loving Cardmakers Blog.


General blog hop details:

•    prizes:  eligibility is based on link up.  Newly created spring-y themed coffee, tea &/or cocoa project to be part of the random draw. (No back linking)
•    Some blogs, as part of the hop will be giving away separate prizes, please make note of their own details regarding eligibility.
•    Turn OFF Word Verification...PLEASE, PLEASE, PLEASE!
•    Super Sponsor prizes will be picked via random.org based on the hop inlinkz.
•    FLASH Sponsor prizes will be picked via random.org based on the hop inlinkz.
•    All Winners will be posted on the Coffee Loving Cardmakers blog on Sunday, March 8th.


Today, I (Samantha) am sharing a super spring-y and fun coffee card for this special occasion!


I knew I wanted to include the fabulous and SUPER trendy Mugs to Go chipboard pieces, so I just looked through my Create a Smile stamps and the bam! the idea came to me! Although, if you ask Christine (the soul, owner and heart of Create a Smile stamps), she'll disagree with this statement! Ha!


This card came together quickly!

* Use some embossing paste and a stencil onto a white piece of cardstock and set aside to dry
* Stamp the images and color with copics (so FUN!)
* Fussy cut and set aside
* Heat emboss the sentiment onto various coordinating strips of cardstock
* Add clear gesso to the To Go cup and set aside to dry
* Once dry, watercolor on the cup!! (the best part!)
* Assemble the card and splatter with black mist


I used the Balance stamp set for the main image and hearts! Part of the sentiment also came from Balance, and the other part came from Monster Party! I LOVE creating my own custom phrases by masking!
I also used the Skinny Chevron Stencil for my card base - and it's BY FAR my favorite stencil!


I chose to go with pinks and whites for this card, because I felt it was extra 'spring-y' that way! But you can use any color combination to give it a personalized and special feel for your recipient!


There are prizes to be had!! Be sure to hop along for your chance to win! You can also link up a card for a chance to win!
We can't wait to see what you make!
Be sure to head over to the Coffee Lovers Blog to read all of the details! 


Thursday, February 26, 2015

Doodle flower!

Hello crafty friends, Yoonsun here!

Our March release -another awesome stamp sets- is coming up soon but, I can't stop playing with February released products!! They are pretty awesome for sure!

Today, I used Botanical Love Stamp Set in a creative way. Guess what? It's a doodle flower!


The large outlined flower stamp is so versatile. I was inspired to doodle as soon as I saw the unique outline used in the flower stamp!

 
  • Stamp the large outlined flower and leaf from Botanical Love Stamp Set on the watercolour paper panel in black and fill them in any lines, dots whatever you like using black fine tip pen -like doodling.
  • Fussy cut the flower and leaf.
  • For the background: Apply water over the panel using a wide brush and Pick up colour from any watercolour medium -I used Peerless watercolour Geranium Pink- and apply onto a watercolour panel. Allow to dry completely!
  • Once dry, adhere doodle flower & leaf using dimensional foam tape.
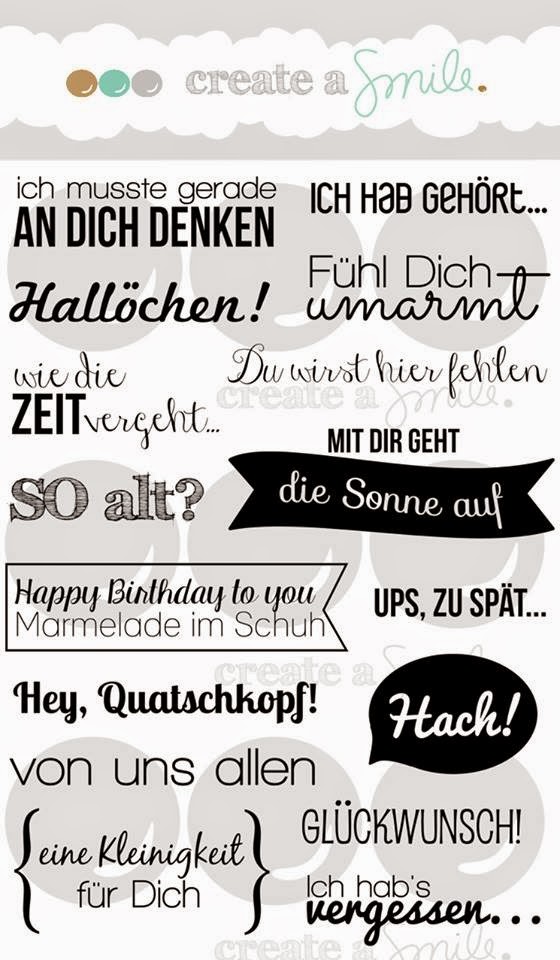
  • For the sentiment: I chose it from Hey Quatschkopf Stamp Set -'I just thought of you' the meaning of the sentiment in German. Stamp it on the white cardstock using VersaFine Pigment Ink Onyx Black and then heat embossed it in clear.
  • Embellish with gold sequins & threads, black twine and patterned washi tape.

I hope you give it a try!! 
 
 
http://www.createasmilestamps.com/stempel-stamps/botanical-love/#cc-m-product-11161076823

http://www.createasmilestamps.com/stempel-stamps/hey-quatschkopf/#cc-m-product-11161104623

 
Add your awesome projects at the sidebar -Linky tool. We love to see your creations. And follow Create A Smile on Facebook get all newest informations.


Thanks for stopping by! Have a wonderful day!!
xoxo Yoonsun 


Wednesday, February 25, 2015

Die-cuts coloring tutorial


Hi! Francine here! 
Today, I'm back with a new card and video tutorial featuring the Create A Smile stamp set called Ausflippen (it’s a German sentiment set). Here is my project: 


In this video, I want to show you how to color die-cuts with Copic markers. I used a mushroom design that I cut with the Silhouette cutting machine.


I used the "Mach mal Pause" sentiment which means "Take a break" in German.
You can see how I did my card in the video below!


CLICK THE HD ICON TO SEE THE VIDEO IN BETTER QUALITY


Stamp set: Ausflippen (Create A Smile)
Inks: Hero Hues Black Dye Ink (Hero Arts)
Silhouette: Mushrooms by Cali Arroyo
Copic markers: mushroom caps: R17, R27, R46, R39; stems: W1, W3, W4, W5, W7; grass: G21, YG63, YG93, YG99
Various: 3D foam pads, Stamp-a-majig, tape runner (removable & permanent), white gel pen (Sakura)


Color your die-cuts with Copic, pencils or watercolors.

If your die-cut is small or thin, fix it with removable tape on a piece of cardstock before you start. It will be easier to color! 


Thanks for stopping by and have a wonderful day!

Tuesday, February 24, 2015

Make it male with a simple graphic card

Hi there,

it's Christine!

It's been a while since I posted something creative over here... You'll soon see why I am too busy with different things.
But well, I keep crafting and I keep sharing. You should check out our Instagram-channel - most of my projects can at least be seen there ;)

I hope you're all doing well and you're having a great crafty time full of mojo. We have a great time at the headquarters - we get some lovely mail from you and I also get a customer's card from time to time - oh how much I love love love this! Keep 'em coming! :)

On to today's project. After all those flower cards let's create something male today!


Making cards for the boys and men in our lives may be tough sometimes. I thought a nice grpahic card with some pop of color would be great. 


1) Frame your cardbase with washi tape and repeatedly stamp your image with grey ink on cardstock that's marker safe (Simon Says Stamp ultra thick white card stock for example)


2) Take a Light grey marker (I used Copic C1) and add a frame to each image.


3) Add a darker grey (C3) around the very edge of the image to make it stand out a bit more.


4) Close the open "Gaps" on the frame with a light grey fine tip marker.


5) Stamp your image again on some patterned paper (the sturdier, the better - we will be popping that up on foam adhesive). I used a scrap of our Feel Good Paper Pack - I love the papers in a plastic bag, that way I can keep all my scraps of that pack together! Also is our super sturdy patterned paper perfect for Paper Piecing!


6) Fuzzy cute your image and go around the edges with a black marker to make the cut look perfect and hide the white paper-core.


7) White emboss an image on a strip of black cardstock. (Mine is from "Ausflippen" and says "friends like you are invaluable"). Pop up the image (mathicng the background stamping) and the sentiment with foam adhesive.


Carefully embellish (Graphic elements are perfect for male cards, but you don't want to overdo it ;) )


Stamps:
 

Paper:


Other:
Simon Says Stamp - White Cardstock Ultra Thick
Copic Markers (C1, C3, C7)
Ink: Hero Arts Soft Granite, Versamark, Versafine
Embossing powder: Hero Arts white


  • Lining up your images straight istead of stamping them randomly gives a more organised and graphic look - but could also try the wild way ;)
  • Heat the Washi Tape with your heat gut before you remove it. I have never ever torn any paper since I started doing this.
  • Men's cards can be made "male" by theme, color scheme or a graphic design. You don't need male images - bute well, Whimsical Wheels is great for that!


To make someone smile by sending your cards out. We'd love to hear about reactions that you get :) Why nor leave us a message on our Facebook Page

Have a great day,